


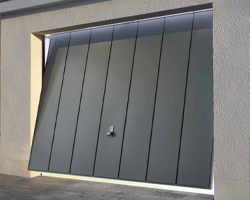


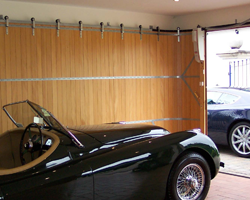


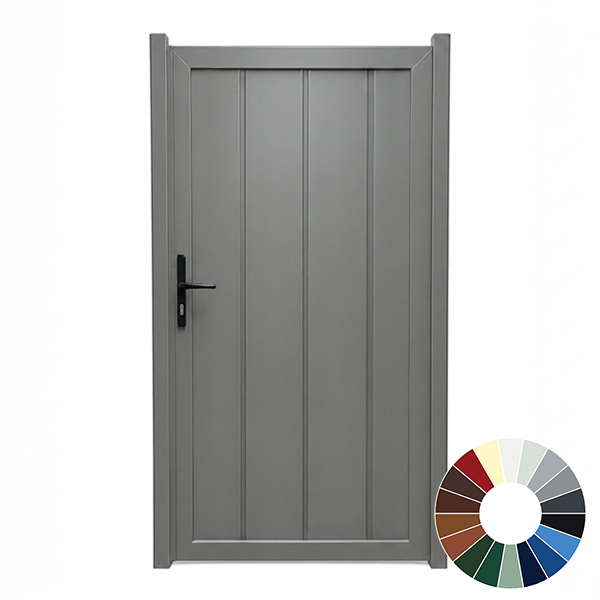

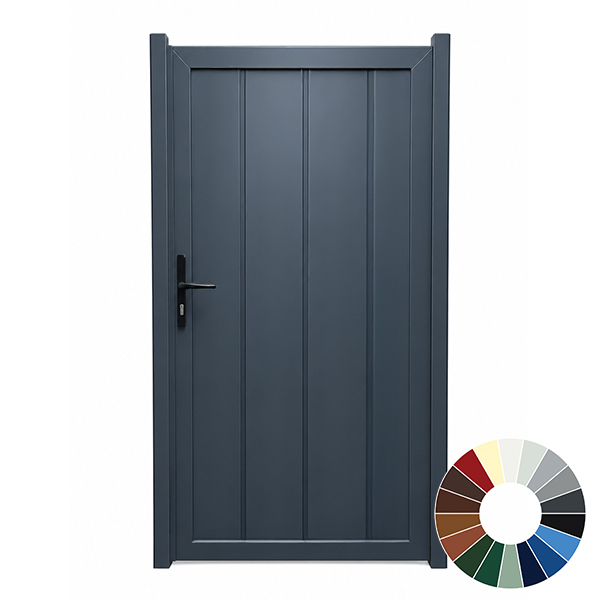
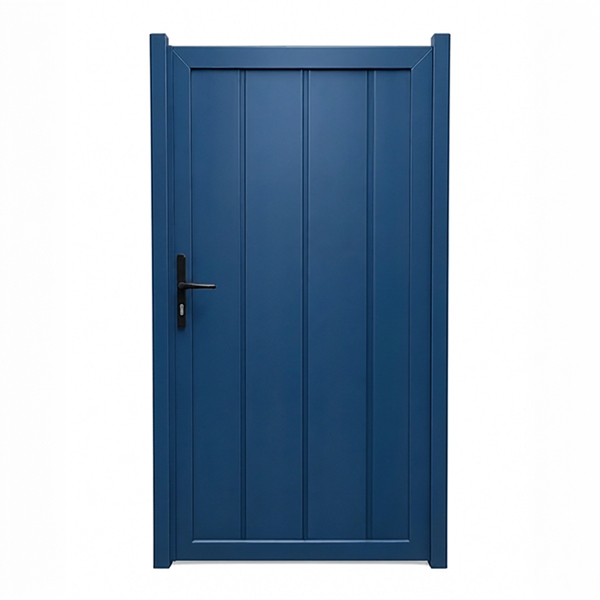

The Medium Rib Vertical side gate combines a minimalist three rib layout with the strength of a fully steel construction. Fewer, wider vertical grooves give a simple, modern front that pairs nicely with contemporary front doors and garage doors. Behind the styling is a double skinned steel panel and steel posts, providing long-term stability and security with very little maintenance needed.
- Minimal vertical ribs, typically three main grooves
- Double skinned steel for a door like feel
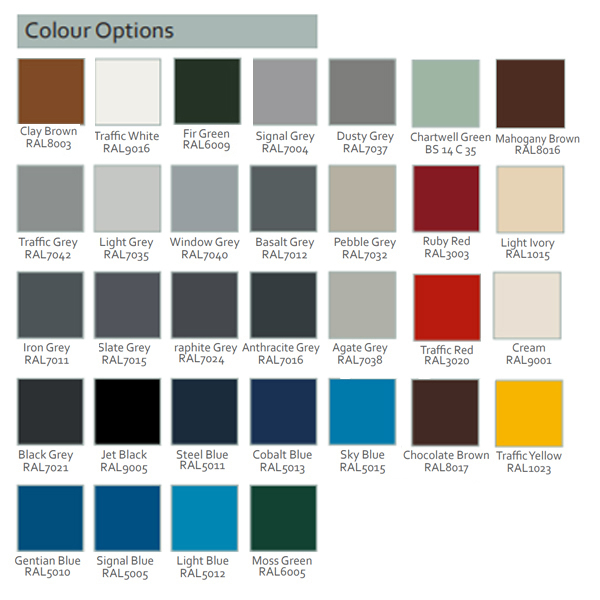
- 32 powder coated colours for easy matching
- Made to measure, with two practical height options
GDO Medium Rib Vertical Pedestrian Gate
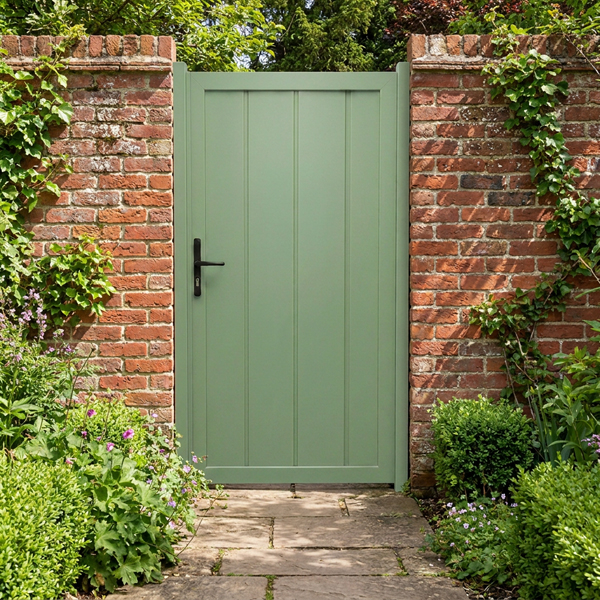
The style and material of a side gate can make a real difference to how secure and well-kept your home feels. Timber often looks good when first installed, but it needs frequent attention and is easily affected by the weather, leading to sticking, twisting and general movement. Aluminium keeps maintenance down, but it can feel quite light and is more prone to denting, which is not ideal where you want a reassuring, solid entrance.
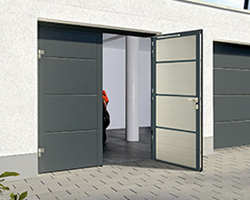
The GDO Medium Rib Vertical Pedestrian Gate uses a fully steel construction with a double skinned gate leaf, so it behaves much more like a proper external door than a lightweight garden gate. The rigid build helps it hold its shape and alignment over time, rather than moving around with the seasons. Combined with a durable powder coated finish available in 32 colours, it gives you the strength and stability of steel with the sort of finish choice normally associated with front doors.
Minimal Vertical Medium Rib Design
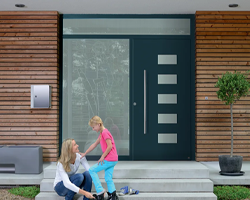
This model uses a small number of broader vertical ribs, typically three main grooves across the width of the panel, to create a simple and very modern look. The reduced number of lines keeps the design clean and uncluttered, giving a more architectural feel than closely spaced narrow boarding. It works particularly well on contemporary homes, or where you want a side gate that quietly matches modern front doors and garage doors without drawing too much attention.
Rigid Double Skinned Steel Construction
The gate leaf and posts are all made from steel, giving a noticeably firm, door-like feel when you open and close it. The double skinned leaf, with steel panels on both faces, adds stiffness and reduces flex, which is particularly useful on wider openings or more exposed positions. This construction offers far more resistance to impact and tampering than thin single-skin or lightweight framed gates, making it a good choice where security is a concern.
Because steel is not affected by moisture in the same way as timber, there is no swelling after heavy rain or excessive shrinking in hot weather. The medium ribbed vertical design keeps its shape and stays properly aligned, helping avoid the sticking, dragging or gapping problems that often develop with wooden gates. For a busy side passage or main pedestrian route, this gives a smoother, more predictable everyday operation.
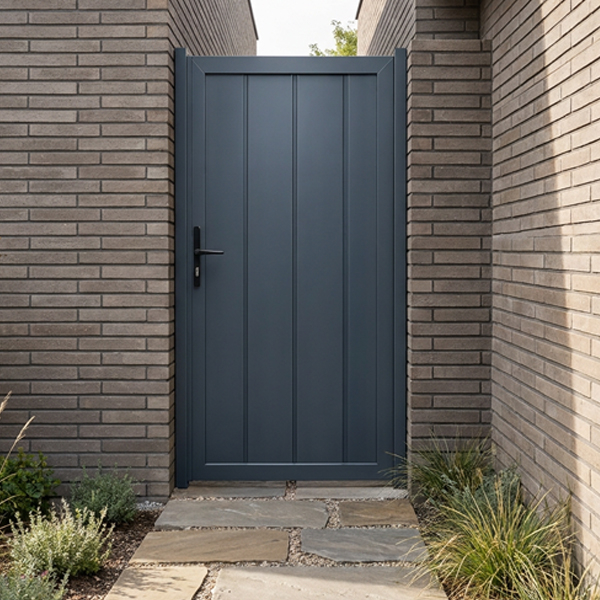
32 Powder Coated Colour Choices
One of the key strengths of this gate is the broad palette of 32 powder coated colours. Many metal gates are offered in only one or two finishes, which makes matching other elements of the property difficult. With this range, you can pick a close match to existing window frames, garage doors and entrance doors, or choose a contrasting colour that still looks intentional and well considered.
The factory-applied powder coat provides a tough, low maintenance surface. There is no need for regular repainting or staining, so day-to-day care is usually limited to an occasional wash down to remove dirt. For homeowners who prefer to fit once and not worry about ongoing treatment, this is a clear advantage over painted or stained timber options.
Made to Measure for Your Opening
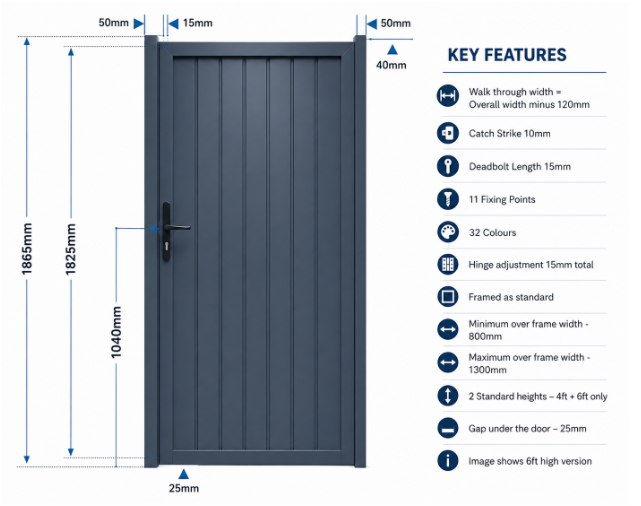
Each Medium Rib Vertical gate is produced to suit the opening, rather than forcing a standard size into place. Overall widths from 800mm up to 1300mm, including the posts, cover most common pedestrian side entrances and pathways. This helps you achieve even, consistent gaps and a more professional finish, especially when installing between existing brick or blockwork.
Two practical heights are available, 1200mm and 1800mm, so you can choose a lower gate where a more open feel is preferred, or a taller version where privacy and security are more important. The broader vertical ribs are spaced to suit the proportions of the leaf at either height, maintaining the clean, minimal appearance.
Hardware and Everyday Use
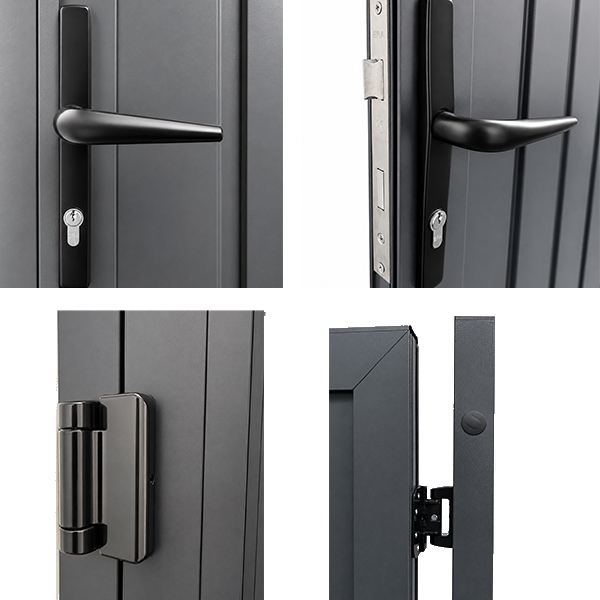
The hardware set is chosen to work with the weight and rigidity of the steel construction, with robust hinges designed to support the leaf and give smooth, controlled movement. A sleek black lever handle sits comfortably within the vertical panel layout and is straightforward to operate. The key-operated lock provides sensible day-to-day security for side entrances, rear garden access and shared alleyways around the property.
Installation Requirements
This gate is intended to be fixed to solid structures on both sides, such as brickwork, blockwork or suitable steel posts. A stable, well-built opening is important to support the rigid steel frame and to maintain correct alignment over time, ensuring the gate continues to open and close cleanly long after it has been installed.
Understanding Your GDO Steel Pedestrian Gate Options
Choosing one of these steel side gates is straightforward once you understand the few key decisions you need to make: size, colour, handing and opening direction. The gates are made to measure, so you end up with something that looks and feels more like an external door than a loose-fitting garden gate.
1. Working Out Your Gate Size
Everything starts with measuring the opening where the gate will go.
- Measure the clear width between your walls or posts in millimetres.
- Measure the clear height from finished floor level up to the underside of any lintel or top structure.
- Check the opening is reasonably square and plumb, as large variations may need correcting before you order.
On the product page you will see drop-down boxes for width and height.
- Choose your gate model first, whether that is Narrow Rib Vertical, Narrow Rib Horizontal, Medium Rib Vertical or Medium Rib Horizontal.
- In the width drop-down, select the next size up from your actual opening width.
- Then choose the height from the drop-down that best suits your opening and the look you want.
At checkout there will be a box where you enter the exact ordering width you require.
- Type in the precise overall width you want the gate and posts made to.
- This dimension includes both posts and the gate leaf.
- No fitting tolerances are added, so what you enter is what is manufactured.
This means you must allow your own fitting tolerances when deciding the final size. For example, if your brick-to-brick width is 1000mm and you want 5mm clearance each side, you would order a 990mm overall gate and post width.
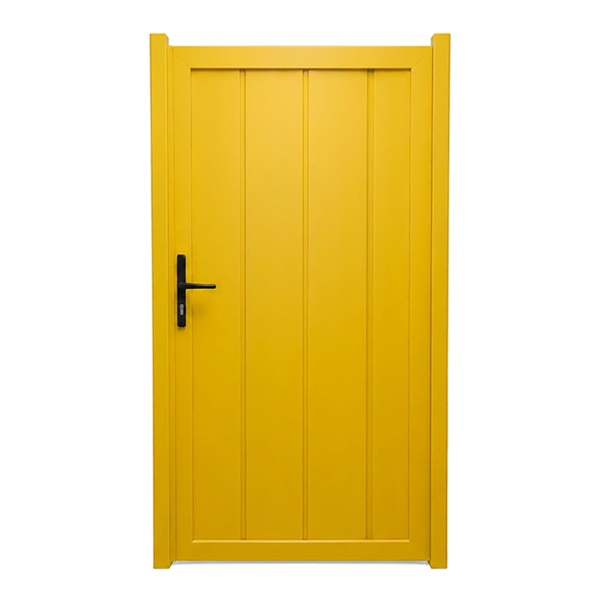
2. Choosing Your Colour
All four designs share the same generous colour palette, which is one of the main advantages over many standard off-the-shelf gates.
- You can choose from 32 powder coated colours.
- The colour you pick is applied to the entire visible gate, including both sides of the gate leaf and both posts.
- This makes it much easier to coordinate with garage doors, windows, front doors and cladding.
If you are unsure which finish to choose, a close match to the garage door or front door usually gives the most coordinated look. A darker neutral shade can also work well where you want the gate to sit quietly against brickwork rather than stand out.
3. Handing - Left or Right
You will be asked to choose a handing for the gate. This simply tells the factory which side the hinges will be on and which side the handle will sit.
For these gates, handing is always taken from the non-hinged side, which is assumed to be the external face of the gate.
- Stand outside your property on the side you normally approach the gate from.
- Face the gate from the handle side, not the hinge side.
- Then decide which side you want the hinges to be on.
- Left hand means the hinges are on your left and the handle is on your right.
- Right hand means the hinges are on your right and the handle is on your left.
The outside face gives the cleaner appearance, while the inside face will show the hinges once the gate is fitted.
4. Opening Direction
You also need to decide whether the gate should open inwards or outwards.
- Inward opening is the standard option and means the gate swings into your property.
- Outward opening is available where you have an obstruction inside or limited room for the gate to swing inwards.
Before choosing, it is worth checking the full swing of the gate so it does not foul walls, steps, bins, pipework or a sloping drive. If the gate opens towards a shared path or public access route, you should also make sure it will not create an obstruction.
5. Picking Your Design
Once the practical choices are sorted, it is simply a case of choosing the panel style that best suits the property.
- Narrow Rib Vertical - slim, closely spaced vertical ribs for a neat, modern look.
- Narrow Rib Horizontal - slim horizontal lines for a more contemporary appearance.
- Medium Rib Vertical - usually three broader vertical grooves for a minimalist, door-like design.
- Medium Rib Horizontal - fewer, wider horizontal ribs for a stronger and more architectural look.
All four designs share the same core specification, so the decision here is mainly about appearance rather than build quality.
- Fully steel construction with a double skinned gate leaf.
- Matching steel posts included.
- Choice of 32 colours.
- Made to measure from 800mm to 1300mm overall width.
- Two practical height options at 1200mm and 1800mm.
6. Delivery and Basic Fitting
Once you have chosen your size, colour, handing and opening direction, your new gate will be manufactured to order and delivered ready for installation.
- The gate posts are supplied separate from the gate leaf.
- The posts are fixed first, making sure they are plumb and correctly spaced.
- The gate leaf is then hung onto the posts and aligned.
- The standard black lever/lever handle is supplied for simple assembly once the gate is hanging correctly.
As with any made to measure steel gate, careful measuring and a sound fixing structure are essential. Taking the time to get the ordering size right will give you a better fit, a neater finish and smoother operation once the gate is installed.
Specification – GDO Medium Rib Vertical Pedestrian Gate
- Gate leaf construction: Double skinned pressed galvanised steel leaf with medium width vertical ribs (typically three main grooves) mirrored on both sides.
- Frame and chassis: Aluminium chassis surrounding the leaf, providing a rigid, corrosion resistant framework.
- Hinges: Black finish aluminium hinges with up to 15mm adjustment to help set the gate plumb and level in the aperture.
- Handle and lock: Black aluminium lever/lever handle set combined with a stainless steel single-point deadbolt, key operated from either side.
- Opening direction: Manufactured to open inwards as standard or set to open outwards if required.
- Sizes: Made to measure overall gate and post widths from 800mm through to 1300mm.
- Heights: Two standard gate leaf heights – approximately 4ft (1200mm) and 6ft (1800mm).
What You Get
- Medium ribbed vertical double skinned galvanised steel gate leaf, factory finished in the selected colour on both sides.
- Pair of galvanised steel box section gate posts, including a latching post with profiled steel closing edge.
- Black aluminium hinges with built in adjustment (up to 15mm) for setting clearances and squareness.
- Black aluminium lever/lever handle set with stainless steel single-point deadlocking lock case.
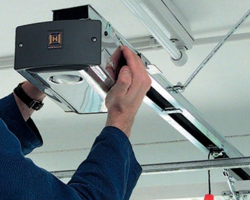
Installing Your GDO Steel Pedestrian Gate
These pedestrian gates are designed so that a competent DIYer or general tradesperson can install them without anything too specialist. The main part of the job is fixing the two steel box section posts accurately, as once they are level, plumb and aligned to each other, hanging the gate itself is quite straightforward.
Prepare the Opening
Before starting, check that the structure you are fixing to is sound and suitable for taking the gate posts.
- Make sure the brickwork, blockwork or other supporting structure is solid.
- Check the floor level and allow for the gate swing and any ground clearance needed.
- Confirm the hinge side, latch side and opening direction before fixing anything in place.
- Have a spirit level, drill, suitable fixings, packers and hand tools ready before you begin.
Fixing the Steel Posts
The first and most important stage is fitting the two galvanised steel box section posts. If the posts are set correctly, the rest of the installation becomes much easier.
- Offer the posts into position and check the overall width matches the ordered size.
- Fix each post securely to the supporting structure.
- Use a level to make sure both posts are perfectly upright.
- Check that the posts are aligned with each other and that the spacing is consistent from top to bottom.
Taking a little extra time here is well worth it. Dead level, properly aligned posts will make the hanging and final adjustment of the gate far simpler.
Hanging the Gate Leaf
Once the posts are fixed correctly, the gate leaf can be positioned and hung onto the hinge side post.
- Support the gate leaf in the opening using packers or wedges at the correct height.
- Line the gate up so that the clearances look even around the leaf.
- Fix the hinges to the gate post and check the gate swings cleanly.
- Open and close the gate carefully to make sure there is no rubbing or binding.
At this stage you are aiming for a smooth initial fit. Final tuning can then be carried out using the adjustable hinges.
Adjusting the Hinges
The black aluminium hinges are adjustable by up to 15mm each, which helps when the opening is not perfectly square or when small corrections are needed during fitting.
- Use the hinge adjustment to even up the gaps around the gate leaf.
- Make small changes gradually rather than over-adjusting in one go.
- Recheck the gate swing after each adjustment.
- Continue until the gate opens, closes and latches neatly.
This adjustment feature is particularly useful in real-world openings where walls and reveals are not always perfectly true.
Handle and Lock Fitting
Once the gate is hanging correctly, the handle and lock can be assembled.
- The gate is supplied with a standard black lever/lever handle system.
- The handle set is fitted once the gate is in place and hanging correctly.
- The stainless steel single-point deadlocking system should then be checked for smooth engagement.
- Make sure the latch and lock line up properly with the closing edge before final tightening.
Final Checks
Before finishing the job, it is worth running through a few final checks to make sure everything is operating as it should.
- Check the posts are secure and all fixings are tightened properly.
- Make sure the gate opens fully in the chosen direction without obstruction.
- Confirm the handle operates smoothly and the lock engages cleanly from both sides.
- Check the gaps around the gate are tidy and consistent.
In simple terms, if you are comfortable fixing two steel posts accurately to a solid structure and setting them level and true, you are already most of the way through the installation. Once that is done, hanging the gate and adjusting it into position is a very manageable job for most practical homeowners or installers.
We pride ourselves on our customer service and are always happy to help