

































Width:up to 1500mm
Height: up to 1900mm GEAR TYPE: Roller Shutter what's this?
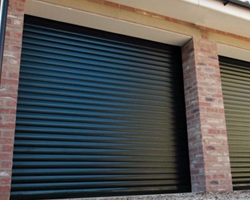
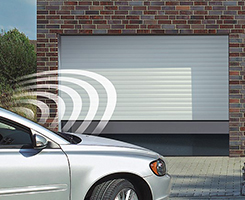
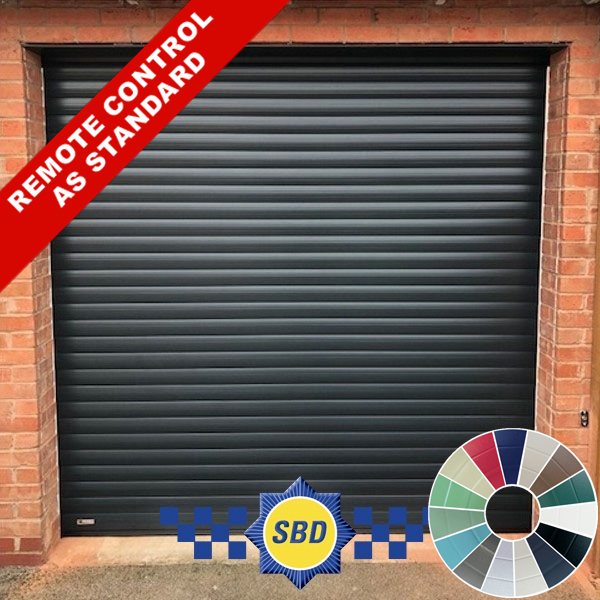
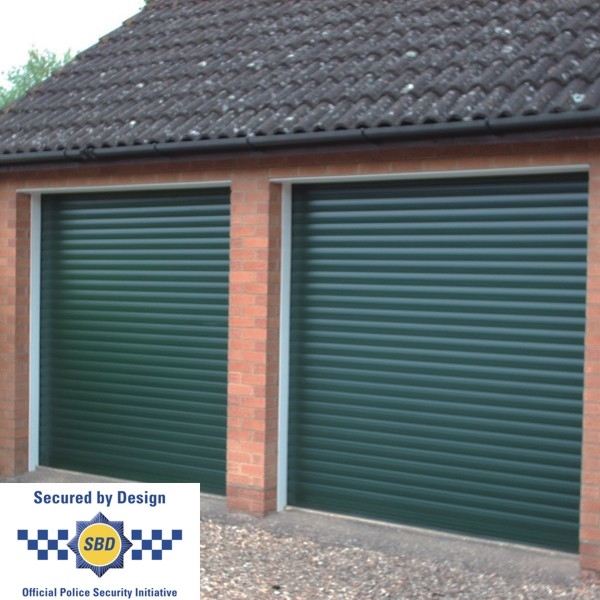
Are the contents of your garage precious to you? The highest level of proection and security is available in this Security Rated electric roller garage door from industry leaders SeceuroGlide. The SeceuroGlide Excel roller door is certified to Secured by Design Level 1 LPCB standards whilst also still offering the luxurious benefits of the original SeceuroGlide roller door.
- Made to measure up to 5200mm wide
- Secured by Design certified regardless of installation position
- Remote control operation as standard
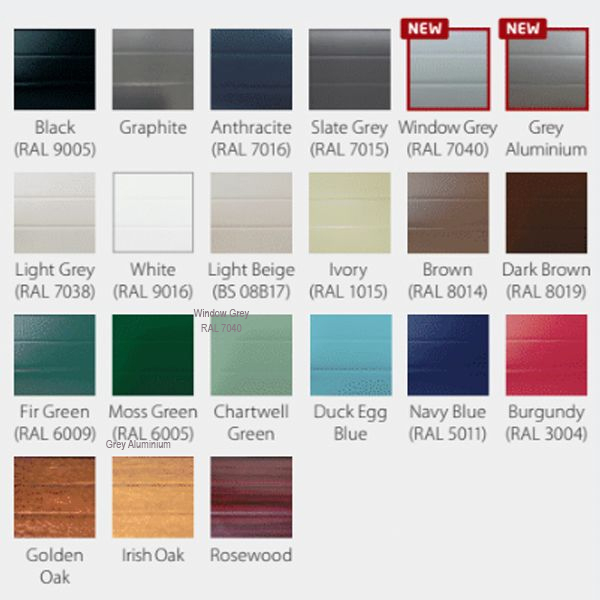
- 21 Standard high quality finished colours
- Up to 7 year warranty

- Secured By Design Specification
- Made to Measure as standard
- Made in the UK
- Up to 7 year automation warranty
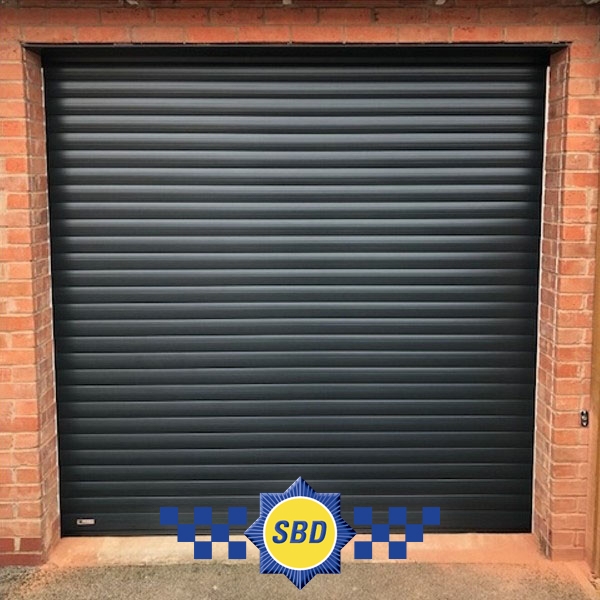
SeceuroGlide Excel Security Electric Roller Garage Door (No Hood Cover)
Individually manufactured to your exact opening dimensions, the SeceuroGlide Excel combines everyday automated convenience with independently certified physical security. It was the first roller garage door tested and approved to LPS 1175 Level 1 (Issue 5, Cert/LPCB ref. 390b/01), carrying official Secured by Design police preference and recognised by major UK insurance underwriters. The Excel delivers verified resistance against forced break-in attempts, regardless of whether the guides are fitted behind, between, or in front of the garage aperture.
The curtain is constructed from twin-walled, CFC-free foam-filled aluminium slats that roll neatly onto an overhead axle assembly. This vertical travel design maximises usable drive-through width and headroom, while nylon end webbing and precision-extruded guides ensure smooth running with minimal operational noise.
No Hood Cover Specification: Fitting Application
This model is supplied as a No Hood Cover version, meaning the overhead curtain roll and axle assembly remain exposed without an aluminium casing box. This is the standard, cost-effective configuration specifically intended for:
- Internal face installations (behind the opening): When fitted to the inside face of the garage lintel and piers, the brickwork naturally encloses and protects the roll mechanism from the outside.
- Custom timber or uPVC fascias: Ideal if you are fabricating your own timber boxing, installing a custom matching fascia, or fitting behind an existing structural drop-down lintel.
*Important: Because the curtain roll is exposed on this version, it cannot be used for external face fitting (where the door is mounted on the outside of the building). If your door is fitting externally, or if you prefer a fully enclosed aluminium box internally for a cleaner finish and added dust protection, please see our SeceuroGlide Excel Full Hood models.
When to Specify the Excel Model
The Excel specification is designed for applications where standard domestic roller doors do not offer sufficient protection:
- Integral garages with house access: Essential when an attached garage leads directly into a utility room or hallway, removing an easy route of entry for burglars.
- High value garage storage: Ideal for protecting prestige vehicles, classic cars, high-end bicycles, motorbikes, or valuable trade tools and workshop equipment.
- Insurance compliance requirements: Delivers genuine LPCB certification recognised by insurers, helping meet policy requirements and lower risk ratings.
- Tested attack resistance: Built to withstand determined attacks using crowbars, screwdrivers, levers, and forced lifting techniques.
Engineered Security Construction
While sharing the same profile finish as the standard SeceuroGlide, the Excel introduces heavy-duty structural components tested specifically against forced entry.
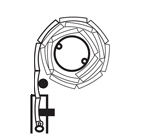
Solid aluminium locking straps and an uprated top rail automatically clamp the curtain down when fully closed to prevent upward jacking. At the base, a reinforced locking bottom slat pairs with high-security guide anchors and steel locking pins that locate firmly into the wide 90mm guide channels, preventing the curtain from being jemmied or pulled sideways out of the tracks.
The entire assembly is supported on an uprated 100mm fluted steel axle with heavy-duty steel end plates to resist lateral distortion under attack.
Drive System and SeceuroSense Plus Control
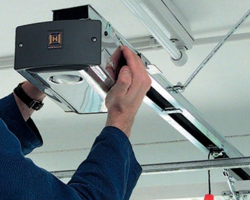
Every SeceuroGlide Excel is powered by a dependable SeceuroDrive tubular motor, backed by an extended 7-year manufacturer warranty for long-term peace of mind.
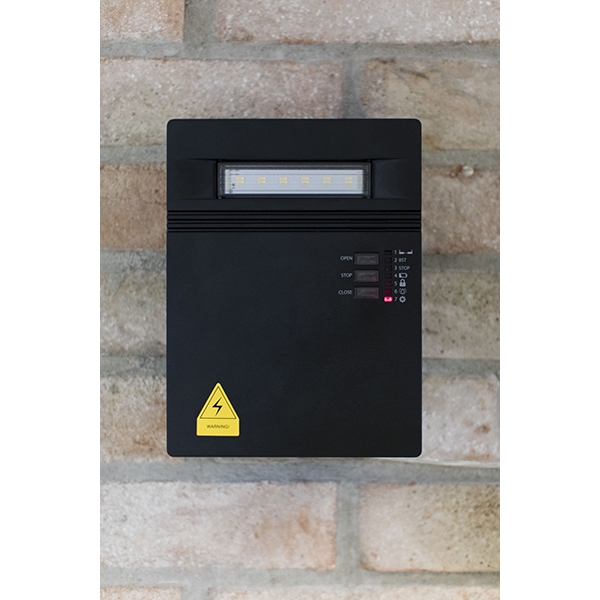
The supplied wall-mounted SeceuroSense Plus receiver unit also includes a 7-year warranty. It features a built-in LED courtesy light to illuminate your garage when arriving home, integrated push buttons on the front cover, an internal 300W auxiliary lighting feed, and clear LED diagnostic indicators for fast fault-finding.
Settings and handset pairing are completed directly from the front panel without having to remove the receiver casing, and an internal alarm module can be slotted directly onto the main control board as an optional upgrade.
Safety and Operation Guidance
Each door includes an optical safety edge built into the bottom rubber seal that reverses curtain travel immediately if an obstruction is detected, along with an internal manual override crank for power failures.
- Secondary access required: To maintain its LPS 1175 Level 1 security rating, the Excel cannot be fitted with an external manual release lock. Your garage must have an alternative pedestrian entrance door or access into the house to operate the manual override during a mains power cut.
- Handset choices: You can choose your two preferred remote fobs at checkout. If selecting 4-button Bi-Directional handsets, bear in mind that three buttons are dedicated to a single door (Open, Close, and Status/ASK). For garages with two or more doors, standard multi-channel handsets are recommended so you can operate multiple doors from a single handset.
- Floor level: A flat, level opening ensures full contact for the bottom weather seal and reliable operation of the optical safety edge.
Configuring Your SeceuroGlide Excel Roller Garage Door
Every SeceuroGlide Excel door is custom-manufactured to your exact opening dimensions. When ordering online, simply select the relevant pricing bracket for your ordering width (up to size) and ordering height (up to size), then enter your exact manufacturing dimensions in millimetres in the specification boxes provided. We manufacture the complete door and guide assembly down to the exact millimetre to ensure a precise fit.
1. Door Curtain Colour
Select your curtain finish from our extensive range of 21 standard colour choices, including painted colours and woodgrain laminate finishes designed to complement standard window and entrance door profiles.
Download Colour Chart PDF >
Looking for a specific match? If none of the standard shades match your property, we can powder-coat your door curtain to virtually any RAL or BS standard colour. Contact our sales team with your colour code for a fast quotation.
2. Guide Channel & Box Colour
Choose the finish for your side guide channels and overhead coil casing. You can match the guides directly to your curtain colour for a uniform appearance, or choose a contrasting colour (such as matching your brickwork, existing window frames, or timber fascias).
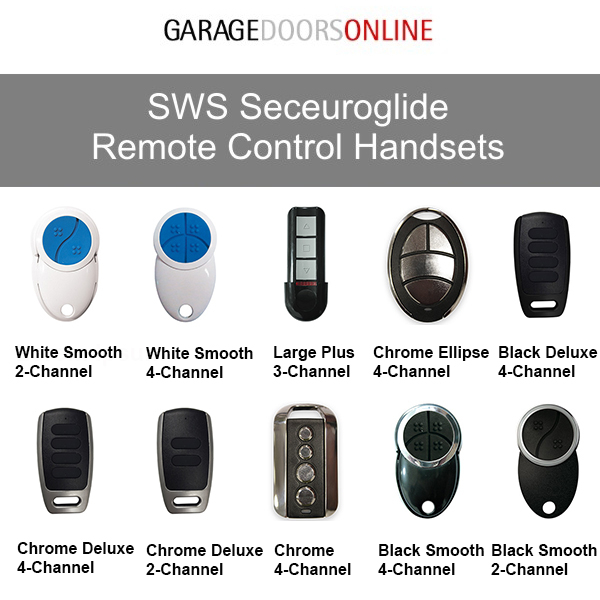
3. Handset Transmitter Choices (2 Included as Standard)
Two remote control transmitters are included in the door price as standard. You can select your first and second handset styles independently from our range of compact key-ring fobs and larger hand-held units:
- Standard Multi-Channel Handsets (2, 3, or 4 button): Ideal if you have two or more electric garage doors or an automated driveway gate. Each button can be programmed independently to open and close a separate door from a single key fob.
- Bi-Directional Handsets (4 button): Feature two way communication with the SeceuroSense receiver. Three dedicated buttons control one door (1 - Open, 2 - Close, 3 - Status/ASK). Pressing the Status button illuminates an LED on the handset to confirm whether the door is open, closed, or stationary without needing line of sight. *Please note: If you have two or more garage doors to operate, you will require one Bi-Directional handset per door, or choose standard multi-channel transmitters instead.

4. Motor Drive & Override Position
Select whether you require the electric tubular motor mounted on the Left Hand Side or Right Hand Side (always determined when standing inside the garage looking out towards the driveway).
The motor side dictates where the power cable exits the headplate and where the internal manual emergency winding handle locates. For ease of access during a power cut, choose the side nearest to your power supply or pedestrian doorway.
5. Door Installation Position
The SeceuroGlide Excel is fully certified to LPS 1175 Level 1 regardless of fitting position. Select from the four standard structural mounting options (viewed from inside the garage looking out):
- Internal Face Fit (Behind Opening): Both guide rails and the overhead roll box fit to the internal face of the brickwork/piers. This is the most common arrangement, maximising your clear drive-through width and height.
- Inbetween Installation (Between Opening): Guide rails fit directly between the structural opening, with the endplates and roll box positioned either directly under the lintel or tucked behind it (depending on lintel depth). Ideal when internal pier space or headroom is limited.
- Combination Fit - Left Face / Right Inbetween: Fits behind the pier on the left-hand side and within the reveal on the right-hand side.
- Combination Fit - Right Face / Left Inbetween: Fits behind the pier on the right-hand side and within the reveal on the left-hand side.
6. External Surface-Mounted Key Switch (Optional)
A weather-resistant, surface-mounted key switch installed externally beside the garage opening. This provides a hardwired, key-operated impulse control to open and close the door from outside without carrying a remote handset. It is particularly useful for gardeners, window cleaners, children, or anyone regularly entering the garage on foot.
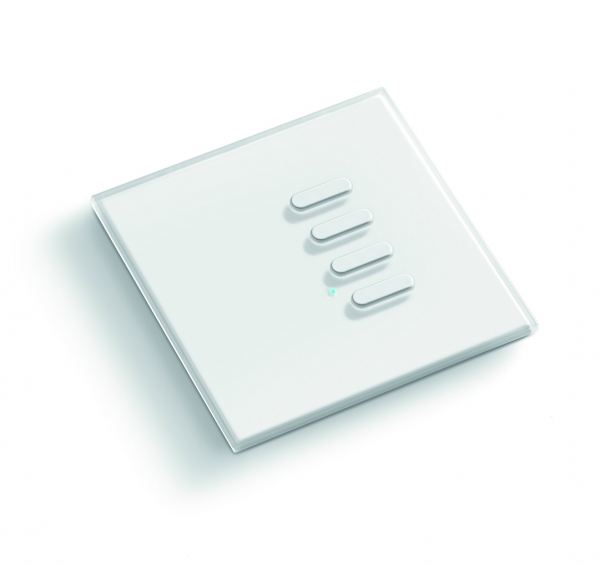
7. Internal Wall Mounted Wireless Push Switch (Optional)
A battery-powered wireless wall switch that mounts inside your garage or home without routing cables back to the control box:
- Standard Impulse Wireless Switch: Functions like a standard wall push button, sending a single impulse to open, stop, or close the door.
- Bi-Directional Wireless Switch: Includes status feedback LEDs directly on the switch face, allowing you to check whether the garage door is open or securely closed from inside your hallway or utility room before going to bed.
8. Acoustic Internal Alarm Kit (Optional)
An integrated, high-output internal alarm module that connects directly to the SeceuroSense Plus receiver board. If an intruder attempts to lever, force, or tamper with the bottom slat while the door is in the locked down position, the sensor immediately triggers an ear-piercing siren to deter the intruder and alert occupants inside the home.
SeceuroGlide Excel Roller Garage Door Specification
The SeceuroGlide Excel is a high-specification, automated insulated roller garage door engineered for exceptional physical security. Independently tested and certified to LPS 1175 Level 1 (Issue 5, Cert/LPCB ref. 390b/01), it satisfies official Secured by Design police preferred specifications and is fully recognised by major UK insurance underwriters.
Technical & Construction Overview
| Security Certification | LPCB LPS 1175 Level 1 (Issue 5) & Secured by Design (Police Preferred Specification) |
| Curtain Profile | Twin-walled, CFC-free polyurethane foam-filled insulated aluminium slats (77mm face depth) |
| Bottom Slat & Anchors | Reinforced heavy-duty extruded aluminium bottom slat with steel guide locking pins and high-security guide anchors |
| Side Guide Channels | Heavy gauge 90mm wide extruded aluminium guides with integrated brush weatherstripping and high-security retention tracks |
| Locking System | Solid extruded aluminium auto-locking straps and uprated top rail to resist forced upward jacking |
| Axle & End Plates | Heavy-duty 100mm fluted steel axle with high-tensile steel endplates to resist lateral structural attack |
| Motor Drive Unit | High-torque SeceuroDrive single-phase tubular motor with integrated thermal overload cut-out |
| Control Receiver Unit | Wall-mounted SeceuroSense Plus smart receiver with integrated LED courtesy light and test lead setup |
| Safety System | Intelligent optical safety edge in bottom rubber seal plus integrated safety brake mechanism |
| Emergency Operation | Internal low-level manual crank handle supplied as standard |
| Manufacturer Warranty | 7-Year Warranty on the SeceuroDrive motor & SeceuroSense receiver; 5-Year finish and mechanical warranty |
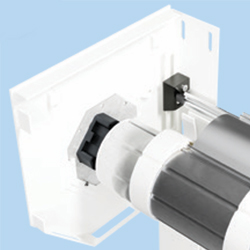 Heavy-duty steel end plates |
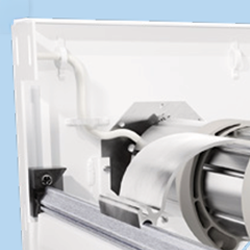 Solid aluminium locking straps & top rail |
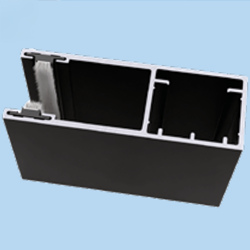 Widespan 90mm guide channels |
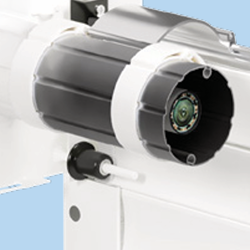 Uprated 100mm fluted axle |
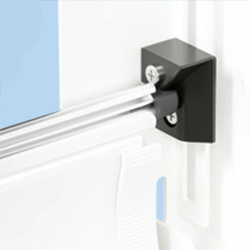 Additional locking points |
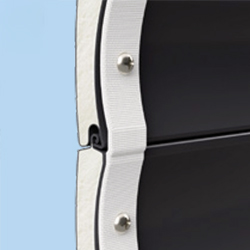 Unique security webbing system |
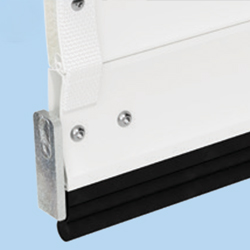 Reinforced locking bottom slat |
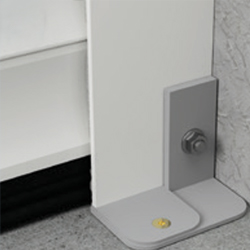 High-security guide anchor |
Important Requirement: Access & Emergency Override
To comply with the strict physical security testing of LPS 1175 Level 1, the SeceuroGlide Excel cannot be fitted with an external manual release system. Drilling through the external face or structure to fit an outside release lock creates a potential point of vulnerability that invalidates the door’s official insurance and police accreditations.
Emergency manual operation is provided exclusively via the supplied internal winding handle. For this reason, the garage must have a separate pedestrian access door or secondary entrance into the building. If your garage has no other entrance and the power fails, you will not be able to operate the door from outside; in those situations, the standard SeceuroGlide Original with an external release kit should be specified instead.
Standard Curtain Finishes & Colour Options
Available in 21 hard-wearing polyester powder-coated solid colours and durable woodgrain laminate finishes. Custom powder-coating to any special RAL or BS colour is available upon request.
| White (RAL 9016) | Anthracite Grey (RAL 7016) |
| Black (RAL 9005) | Graphite (RAL 7024) |
| Light Grey (RAL 7038) | Slate Grey (RAL 7015) |
| Window Grey (RAL 7040) | Grey Aluminium (RAL 9007) |
| Navy Blue (RAL 5011) | Duck Egg Blue (BS 16C33) |
| Fir Green (RAL 6009) | Moss Green (RAL 6005) |
| Chartwell Green (BS 14C35) | Burgundy (RAL 3004) |
| Brown (RAL 8014) | Dark Brown (RAL 8019) |
| Ivory (RAL 1015) | Light Beige (BS 08B17) |
| Golden Oak (Woodgrain) | Rosewood / Irish Oak (Woodgrain) |
* Headplate fascias and full hood enclosures are supplied in matching White or Mid Brown as standard, and can be colour-matched to the curtain for an additional surcharge.
Transmitter Options (2 Included in Standard Door Kit)
You can mix and match your two included remote transmitters at order stage according to how you use your garage:
- Large Plus 3 Channel Transmitter: Ergonomic hand-held transmitter with large, tactile buttons and a dedicated wall holster. Great for keeping by the house entrance door or in the car cup holder.
- Black Smooth Transmitter (2 Channel or 4 Channel): Compact modern key-fob transmitter with brushed metallic edging and included wall bracket. Ideal for carrying on your everyday car keyring.
- White Smooth Transmitter (4 Channel): Sleek, high-gloss white pocket transmitter with wall mounting clip. Perfect for controlling up to 4 separate garage doors or driveway gates.
- Classic 2 Channel Transmitter: Compact, hard-wearing key-ring fob with recessed buttons to prevent accidental operation while in your pocket.
Optional Access & Security Accessories
- External Digital Wireless Keypad: Weatherproof surface-mounted digital keypad positioned outside the garage. Allows entry via a secure 4-to-8 digit PIN code, eliminating the need to carry keys or handsets on foot.
- External Surface Mounted Key Switch: Heavy-duty single-pole key switch supplied with 3 physical keys. Hardwired to the internal receiver to provide secure external key-turn operation.
- Internal Wireless Wall Switch: Battery-powered wall switch that can be installed inside your hallway or garage wall without running surface cabling. Available in standard push-to-run or bi-directional status models.
- Integrated Alarm Module: High-decibel warning siren that slots directly into the SeceuroSense Plus control board, instantly triggering if bottom slat tampering is detected.
Details on the SeceuroDrive Motor Limit Setting Instructions can be watched here.
Installation Guidance: SeceuroGlide Excel Roller Garage Door
Installing a SeceuroGlide Excel requires practical trade skills, accurate measuring, and strict adherence to fitting tolerances to preserve its LPS 1175 Level 1 security rating and smooth operation. Follow the guidance below to prepare your garage opening and complete a professional installation.
1. Essential Site Requirements
- Secondary access is mandatory: Because the Excel cannot have an external manual release without compromising its security rating, there must be a separate side door, rear access door, or integral entrance into the garage in case of a mains power cut.
- Level floor across the entire opening: The optical safety edge built into the bottom rubber seal requires a flat, level threshold to seat properly. Significant dips or high spots can trigger the obstacle reversal mechanism or compromise the ground seal.
- Structural brickwork and fixings: Guide rails and endplates must be fixed into solid brickwork, blockwork, or substantial steel/timber framework using the heavy-duty fixings provided. Cavity closers, loose render, or aerated lightweight blocks will not provide sufficient structural resistance against forced attack.
- Power supply: A standard 230V 13A switched single socket is required within 1 metre of the chosen motor and receiver location.
2. Space and Clearance Requirements
To ensure the door assembly clears the opening and operates freely, verify your garage has the following minimum structural clearances:
- Headroom for endplates and roll box: You need a minimum of 300mm of clear headroom above the structural opening height for the axle, endplates, and curtain roll.
- Side room for 90mm guide channels: The heavy duty Excel guides are 90mm wide on each side. When fitting behind the opening (internal face fit), you need at least 90mm of flat internal pier return on both the left- and right-hand sides.
- Internal roll projection: Allow 300mm of depth into the garage from the mounting face for the roll casing and endplate bracketry.
3. Determining the Correct Fitting Position
All references to Left Hand (LH) and Right Hand (RH) are determined from inside the garage looking out towards the driveway:
- Internal Face Fit (Behind Opening):
- Guides and roll box fit to the internal face of the structural opening.
- Provides maximum clear drive-through width and height.
- Ordering Width = Clear brick opening + 180mm (90mm guide left + 90mm guide right).
- Ordering Height = Clear brick opening height + 300mm endplate headroom.
- Inbetween Fit (Between Opening / Reveal):
- Guides fit directly to the reveal jambs, with the roll sitting either underneath the lintel or behind it.
- Clear drive-through width will be reduced by 180mm (the two 90mm guides).
- Clear drive-through height will be reduced by 300mm if the roll box sits underneath the lintel.
- Ordering Width = Total width between brick reveals (minus 10mm fitting tolerance).
- Ordering Height = Floor to underside of lintel (minus 5mm to 10mm fitting tolerance).
- Combination Fit: Where one internal pier is available and the other is flush, one guide fits behind the brickwork and the other fits between the reveal. Ensure tolerances are calculated accurately for the inbetween side.
4. Step-by-Step Installation Process
- Check the opening: Measure the width at the top, middle, and bottom, and the height on both sides. Check that the opening is square and the floor is level across the threshold.
- Assemble the framework: Lay the 90mm guide channels flat on clean protection and slot the heavy-duty steel endplates (attached to the top box/fascia) into the top of each guide.
- Offer the frame up to the aperture: Lift the assembled frame against the opening. Use a spirit level to ensure the guides are perfectly vertical (plumb), square, and parallel across the diagonal measurements. Clamp the guides into place.
- Secure the guide channels: Drill through the factory pre-drilled fixing points into the structural brickwork and fix securely using heavy-duty masonry anchors.
- Mount the fluted axle & motor: Place the 100mm fluted steel axle with internal SeceuroDrive motor onto the endplate brackets and secure the safety brake on the dummy end.
- Hang the curtain: Carefully feed the insulated curtain down through the 90mm guide channels. Attach the solid extruded locking straps to the axle using the dedicated fixing rings, ensuring the straps lock straight when the door is closed.
- Engage guide anchors and bottom slat: Ensure the bottom locking slat anchors line up correctly with the guide channels to engage smoothly when fully down.
- Mount the SeceuroSense Plus receiver: Fix the receiver wall unit at a convenient working height (approx. 1.5m from the floor) on the motor side. Connect the motor cable, power supply, and safety edge transmitter.
- Set limits & commission: Use the built-in test lead on the SeceuroSense board to set upper and lower travel limits without opening the main casing. Pair the supplied remote transmitters and test the optical safety edge for obstacle reversal.
5. Practical Fitting Advice & Tips
- Never force the guides: Guide channels must be perfectly parallel and plumb. If the brickwork is uneven, use solid metal or plastic packers behind the guides rather than pulling them out of square with fixings.
- Allow for fitting tolerance: For inbetween installations, always deduct a minimum of 10mm overall width and 5mm to 10mm overall height from your tight brick-to-brick measurements to allow the frame to square up easily.
- Emergency manual override test: Once installed, always test the internal winding handle to verify smooth manual operation before closing up the site.
Comprehensive Warranty Cover: SeceuroGlide Excel
Every SeceuroGlide Excel electric roller garage door is manufactured in the UK by SWS UK to ISO 9001 quality certification standards. All components are covered by transparent, manufacturer-backed warranties to provide long-term peace of mind and dependable operation.
Warranty Period Summary
| Component / Finish | Cover Period | Scope of Manufacturer Warranty |
|---|---|---|
| Foiled Woodgrain / Renolit Laminate Finish | 10 Years | Laminate weather fastness against natural sunlight and weathering; protects against delamination, blistering, streaking, cracking, and excessive fading |
| SeceuroDrive Tubular Motor | 7 Years | Motor gearbox, limit mechanisms, internal electrical drive components, and mechanical integrity |
| SeceuroSense Plus Control Receiver | 7 Years | Receiver main board, integrated transformer, push control interface, and internal LED courtesy lighting |
| Standard Painted & Powder-Coated Slat Finishes | 5 Years | Curtain paint adhesion, cracking, peeling, and blistering on standard painted and powder-coated colour finishes |
| Mechanical Hardware & Security Components | 5 Years | Axle barrel, 90mm guide channels, bottom locking slat, high-security guide anchors, autolocks, endplates, and safety brake |
| Remote Control Handsets & Electrical Accessories | 2 Years | Transmitters, wireless wall switches, key switches, digital keypads, and optical safety edge sensors (excludes consumable batteries) |
Detailed Terms of Manufacturer Cover
- 10-Year Laminate Foil Guarantee: Curtains ordered with foiled woodgrain or Renolit laminate finishes (such as Golden Oak, Rosewood, and Irish Oak) carry an extended 10-year manufacturer warranty. This covers the weather fastness of the laminate film against UV degradation, delamination, peeling, flaking, or visible cracking under normal atmospheric exposure.
- 7-Year Motor & Control System Guarantee: The high-torque SeceuroDrive motor and SeceuroSense Plus receiver unit carry a 7-year manufacturer guarantee against mechanical and electronic manufacturing defects when installed on domestic properties.
- 5-Year Standard Finish & Mechanical Guarantee: Standard polyester powder-coated slats and all core structural components (including the heavy-duty fluted axle, steel endplates, and autolocks) are protected against premature material failure for 5 years.
Warranty Conditions & Care Guidance
To keep your SWS manufacturer warranty fully valid, please follow standard operational and care guidelines:
- Correct Installation: The door must be fitted plumb, level, and square in accordance with official manufacturer instructions, using appropriate heavy-duty masonry fixings.
- Domestic Duty Cycle: The door and automation system are designed for standard residential duty cycles (rated up to 5 cycles per day).
- Regular Cleaning: Clean the curtain surface and brush seals every 3 to 4 months with warm soapy water and a soft cloth to remove grit, salt deposits, and grime. Do not use abrasive scouring pads, corrosive solvents, or high-pressure jet washers directly on the seals, slats, or motor head.
- Security Certification Compliance: In line with LPS 1175 Level 1 accreditation, never drill through or modify the curtain or guides to fit unapproved external override mechanisms.
Warranty Exclusions
The warranty does not cover accidental damage, vehicle impact, malicious damage, improper installation, electrical supply surges, unapproved third-party modifications, or superficial scratching resulting from foreign debris trapped in the coil.
Measuring Guide: SeceuroGlide Excel Roller Garage Door
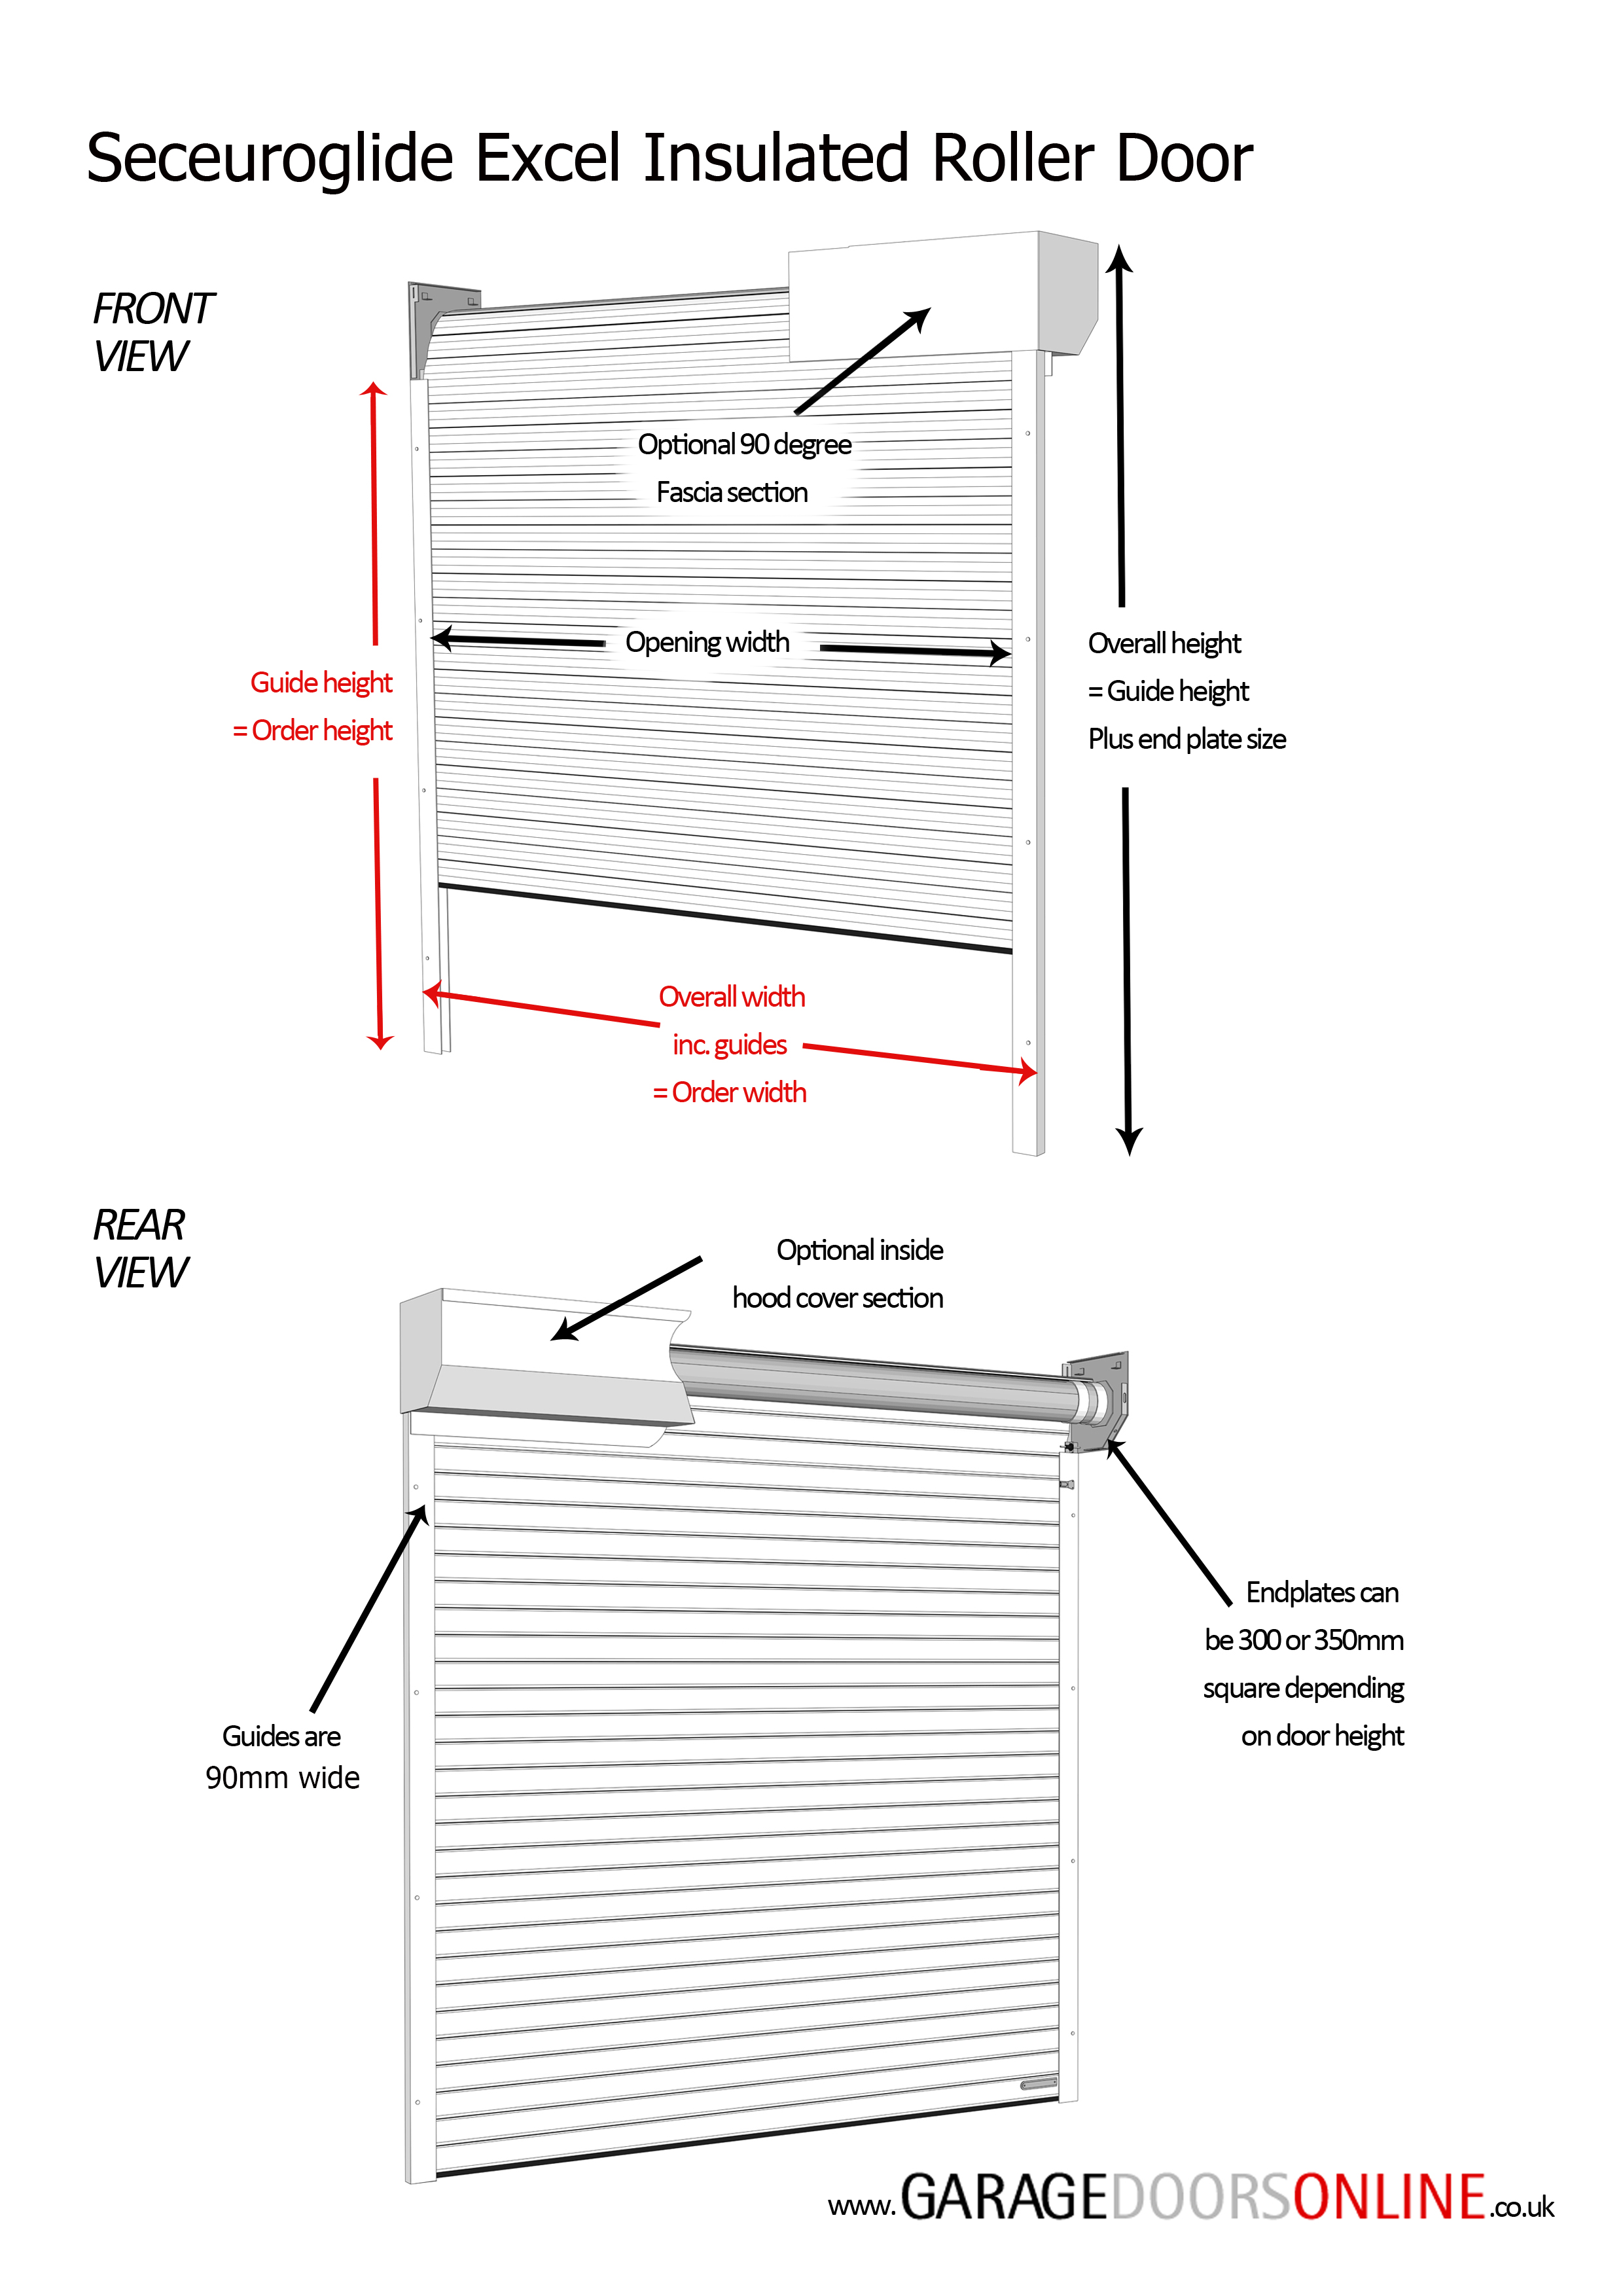
Every SeceuroGlide Excel door is custom manufactured to your exact dimensions down to the millimetre. Refer to the 3D dimension drawing below alongside this guide to determine your exact ordering sizes and verify your garage opening clearances.
1. Key Dimensions Explained (Refer to 3D Drawing)
- Ordering Width (Over Guide Width): The total external width of the door unit, measured from the extreme outside edge of the left guide to the extreme outside edge of the right guide. Because the Excel uses heavy duty 90mm guide channels on both sides, the overall width includes 180mm of guide profile (90mm + 90mm).
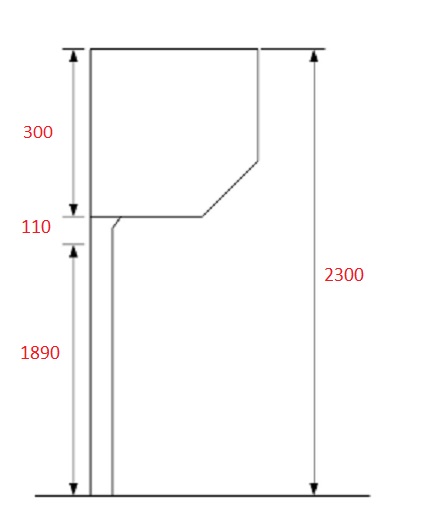
- Ordering Height (Guide Height): The height measured from the finished garage floor level to the underside of the overhead endplates/casing.
- Total Overall Height: The Ordering Height plus the 300mm endplate/box height (Total Height = Ordering Height + 300mm).
- Clear Opening Width: The unobstructed drive-through width between the inside faces of the guide channels.
- Clear Opening Height: The drive-through clearance beneath the bottom rubber seal when the curtain is fully open (usually around 50mm below the underside of the endplates).
- Side Room: The flat, unobstructed internal pier space on the left and right sides of the opening. A minimum of 90mm flat return is required on each side for an internal face fit.
- Headroom: The vertical clearance above the opening height up to the lowest ceiling obstruction, joist, or roof line. A minimum of 300mm is required for the roll casing.
2. Measuring for Internal Face Fit (Behind Opening)
This is the most common installation position, fitting the guides and roll box behind the brickwork piers to maximise drive-through width and height.
- Step 1 - Measure the brick opening width: Measure the clear daylight brick opening width at the top, middle, and bottom. Use the largest measurement if you want the guides positioned flush behind the piers.
- Step 2 - Calculate Ordering Width: Add 180mm (90mm left guide + 90mm right guide) to your brick opening width. (Example: 2280mm brick opening + 180mm = 2460mm Ordering Width). Verify that you have at least 90mm of internal flat pier space on both sides.
- Step 3 - Measure the brick opening height: Measure from the finished floor to the underside of the lintel on both the left and right sides.
- Step 4 - Calculate Ordering Height: Your Ordering Height equals the lintel height. Verify that you have at least 300mm of clear headroom above the lintel for the endplates and coil box.
3. Measuring for Inbetween Fit (Between Structural Reveals)
Used when there are no internal return piers or where headroom inside the garage is limited, positioning the guides between the jambs and the box directly underneath the lintel.
- Step 1 - Measure the reveal width: Measure between the brick reveals at the top, middle, and bottom. Note the smallest measurement.
- Step 2 - Calculate Ordering Width: Deduct a minimum 10mm fitting tolerance from your smallest measurement so the guides square up easily without binding. (Example: 2300mm smallest opening - 10mm tolerance = 2290mm Ordering Width). Clear drive-through width will be the Ordering Width minus 180mm.
- Step 3 - Measure the reveal height: Measure from the finished floor to the underside of the lintel on both sides. Note the smallest measurement.
- Step 4 - Calculate Ordering Height: Deduct the 300mm box/endplate height, then deduct a 5mm to 10mm fitting tolerance. (Example: 2400mm floor-to-lintel - 300mm box - 10mm tolerance = 2090mm Ordering Height).
4. Measuring for Combination Fit
If your garage has a return pier on one side only (e.g., face fit behind the left pier, inbetween on the right reveal):
- Add 90mm for the face fitted guide side and deduct 5mm fitting tolerance for the inbetween guide side.
- Always specify which side is face fitted when viewed from inside the garage looking out.
5. Practical Checklist Before Ordering Online
- Check for floor level: Check across the opening with a long spirit level. If the floor slopes, order to the highest point of the floor and note that the bottom rubber seal will compress to take up small floor variations (up to 15mm).
- Check for obstructions: Ensure there are no gas pipes, electrical meters, consumer units, or structural RSJs fouling the 90mm side-room or 300mm headroom zones.
- Secondary access check: Confirm your garage has a separate pedestrian door or integral house door, as the security-certified Excel cannot be fitted with an external manual release.
 Our Promise
We pride ourselves on our customer service and are always happy to help