

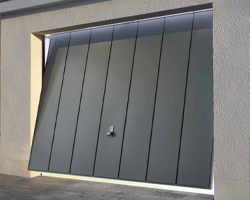












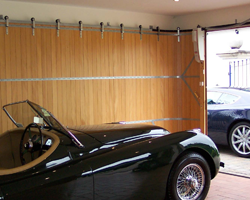




















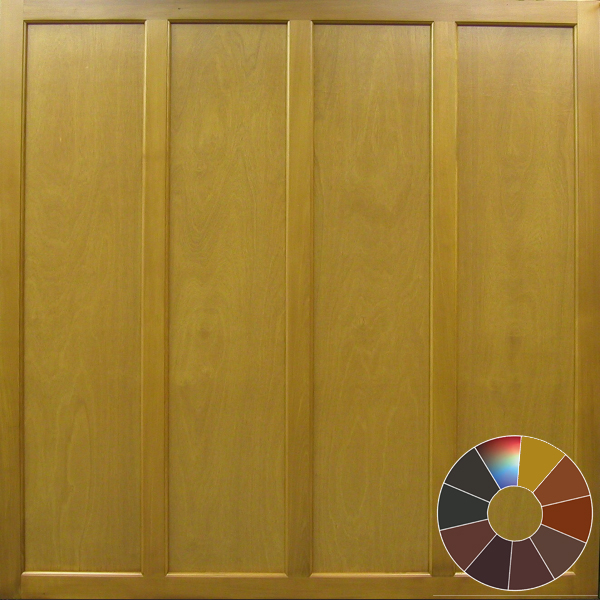

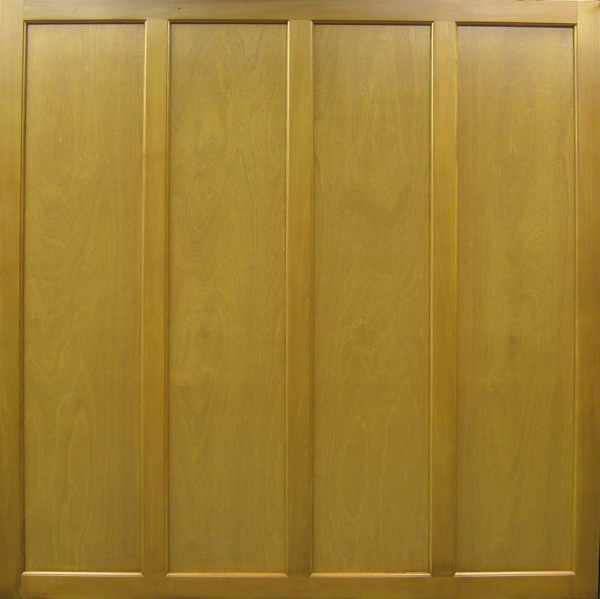


The Cedar Hope Timber up and over garage door is traditionally panelled with a beautifully elegant vertical panelled design to perfectly compliment a classically styled home. Simple design to match many properties.
This door is manufactured in the highest quality exterior 9mm plywood panels which are glue bonded into a solid cedar frame. The frame is traditionally constructed with solid cedar stiles and rails, all joints are morticed and tenoned, glued and wedged which is the strongest method in door construction. The Hope panelled door perfectly enhances the appearance of any modern of period designed home.

- Made to measure as standard
- Traditional joinery build
- Responsibly sourced timber with PEFC
- Factory finished colour options
Cedar Hope Timber Up and Over Garage Door
Clean Four Panel Architecture
The Hope is a traditionally panelled garage door featuring four tall, flat recessed panels set within a solid Western Red Cedar joinery frame (on single width size doors). With its clean lines and square headed layout, it provides a timeless, dignified look that sits comfortably alongside a wide range of British house styles. It represents one of the most accessible and popular ways to invest in a joinery built timber door.
Stable Plywood Infill in Solid Cedar Framing
The perimeter stiles, rails, and three vertical muntins are joinery crafted from solid kiln dried Western Red Cedar, connected by wedged mortice and tenon joints for lasting strength. The infill panels are constructed from 9mm exterior grade cross laminated plywood, bonded into the solid framing. Cross lamination ensures the panels remain flat and dimensionally stable through hot summers and damp winters, preventing gaps from opening at the joints while keeping overall door weight manageable for smooth manual or electric operation.
Property Types and Architectural Suitability
The balanced four panel arrangement complements 1930s suburban semis, 1960s to 1980s developments replacing tired steel doors, and modern properties with panelled front entrance doors. Its understated proportions work equally well on compact single openings and wide double garages.
Finishes and Timber Framing
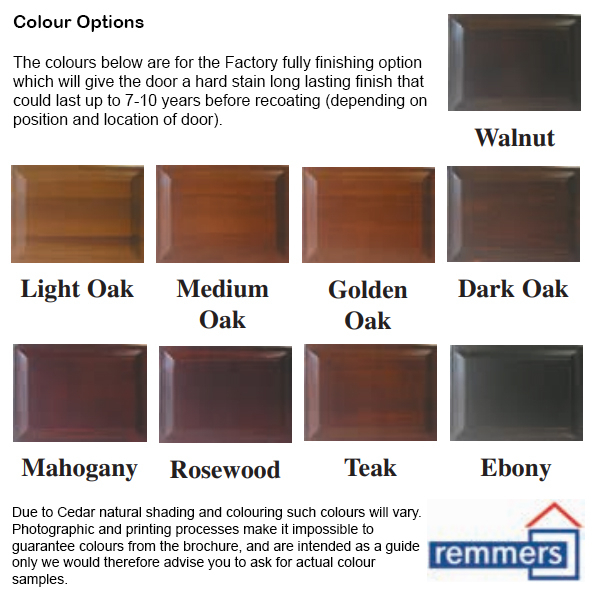
Exterior grade plywood absorbs woodstain slightly differently from solid cedar framing, often curing a subtle shade lighter or darker. This natural two tone effect highlights the recessed panel layout and adds depth to the door face. Choose from eight factory Remmers translucent woodstains or request a factory paint finish in white, grey, or bespoke RAL colours.
*Looking for narrower vertical panels? The Castleton offers a six panel layout, while the Wingfield introduces an arched head rail.
Customising and Ordering Your Cedar Timber Up and Over Garage Door
Every Cedar timber up and over garage door is joinery crafted from premium Western Red Cedar and built to order as standard. Follow the simple ordering steps below to configure your door to your exact specification:
1. Made to Measure Sizing
- Choose Your Size Bracket: Select the relevant "Up to Width" and "Up to Height" price band from the drop down menus.
- Enter Your Exact Ordering Dimensions: Enter your exact millimetre sizes in the dimension boxes provided.
- How Cedar Ordering Sizes Work: On all Cedar timber up and over doors, the ordering dimensions are the internal dimensions of the timber fixing sub frame (the clear opening between the upright frame legs and from the floor to the underside of the head frame). Measure the clear opening inside your timber sub frame rather than the outer brickwork.
2. Factory Finish and Colour Treatments
Western Red Cedar is a natural timber with rich grain variation. You can choose how you want your door panel treated before it leaves the joinery workshop:
- Base Coat Stain (For Site Finishing): Dipped in a base coat preservative stain to protect the timber during transit and installation. This requires a quality top coat wood stain or microporous paint to be applied on site immediately after fitting.
- 8 Factory Standard Translucent Finishes: Fully finished at the factory with a multi coat, microporous wood stain system that highlights the natural grain while providing long term weather protection. No site painting required.
- Primer and Custom Paint Finishes: We can supply your door with a factory white or grey paint primer ready for site painting. We also offer full factory paint finishing in classic RAL shades, British Standard colours, or bespoke Farrow & Ball palettes. Please contact our team by phone or email for custom paint pricing and details.
3. Timber Fixing Sub Frame
Timber up and over garage doors require a timber sub frame to mount the lifting gear, springs, and tracks:
- Softwood Sub Frame: Cost effective, kiln dried structural timber treated for durability.
- Hardwood Sub Frame: A denser, premium timber option offering maximum longevity and structural stability.
- Frame Profiles: 70mm x 70mm is the standard profile for single doors. A heavier 90mm x 70mm profile is available and strongly recommended on wider or double size doors to carry the extra panel weight without flexing.
- No Frame Required: Select this if you already have a sound, square, existing timber sub frame in place that meets the required dimensions.
4. Sub Frame Colour Matching
- Matched to Door Panel: Have your timber sub frame factory stained or painted to match the chosen finish of your garage door for a seamless architectural look.
- Base Coat Stained: Supplied with a protective base coat treatment ready for you to finish on site alongside existing exterior woodwork.
5. Handle and Locking Options
- Manual Operation with Handle: Supplied with an ergonomic exterior handle, euro profile cylinder lock, keys, and internal latching mechanism. The door face arrives pre drilled for the handle assembly.
- No Handle / Undrilled for Automation: If you are fitting an electric operator, you can specify your door without a handle or lock hole. This leaves the natural cedar face clean, unbroken, and far more secure against forced entry.
6. Double Door Design Variations
On larger double width doors, many Cedar models offer layout choices to balance the wider proportions across your driveway:
- Dual Arch or Twin Panel Styling: Selected designs can be built with two matching arched head details or a central vertical mullion section to give the traditional visual impression of two single garage doors side by side.
- Single Continuous Span: A single uninterrupted horizontal or vertical pattern across the full double width.
- *If you have a particular design arrangement in mind, please speak with our team or send us a quick sketch and we will confirm the exact workshop drawing before production begins.
7. Manual or Remote Control Electric Operation
- Manual Operation: Perfectly balanced by high quality counterbalance springs and lifting gear for smooth manual lifting and closing by hand.
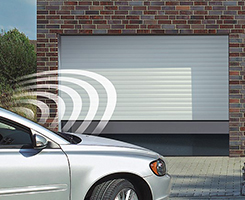
- Electric Automation: Pair your door with a heavy duty remote control electric operator system running on retractable operating gear, supplied with handheld remote control handsets for touch of a button opening from your car.
8. Emergency External Manual Release (Electric Doors Only)
- Essential for Garages with No Secondary Access: If your garage does not have a pedestrian side door or rear entrance, you must order an external emergency release device with your electric operator.
- How It Works: In the event of a power cut or electrical fault, a discreet keyed release mechanism on the outside allows you to disengage the electric drive and open the garage door manually from the driveway.
Cedar Traditional Panelled Up and Over Garage Doors
Applicable models: Castleton, Chatsworth, Hope, and Wingfield.
This door belongs to the Cedar Traditional Panelled range. It combines a solid Western Red Cedar joinery perimeter frame with durable 9mm exterior grade plywood infill panels. This construction provides authentic timber character in a lighter, cost effective door panel that is exceptionally easy to operate manually or automate.
Traditional Joinery Construction
- Solid Cedar Perimeter Framing: Stiles, rails, and muntins are precision machined from selected kiln dried Western Red Cedar. Corner joints are traditional wedged mortice and tenons, glued with waterproof structural adhesives. Expanding internal timber wedges lock each tenon permanently inside the mortice pocket, creating rigid corner joints engineered to carry overhead loads without racking.
- 9mm Exterior Grade Plywood Infill: The recessed infill panels are constructed from 9mm exterior grade cross laminated plywood, securely bonded into the solid cedar stiles and rails. Cross lamination prevents panels from shrinking, cupping, or splitting during dry summer weather, keeping panel joints neat and tight all year round.
- Subtle Tone Contrast: Because cross laminated exterior plywood absorbs woodstain slightly differently from solid cedar stiles and rails, the panels often cure a subtle shade lighter or darker than the frame. This creates a distinct visual contrast that accentuates the panel recesses and rail arches. *If you prefer identical grain texture and precise colour matching across panels and frame, explore our Traditional Solid Panelled range (20mm solid cedar panels).
- Structural Rear Bracing: Doors wider than 8ft (2438mm) or taller than 7ft (2134mm) are built with additional vertical and lateral timber or steel chassis bracing to provide rigidity and eliminate panel deflection when resting in the horizontal open position.
Glazing Options (Windowed Models)
- Where windows are featured (such as the Castleton and Chatsworth), panels are glazed at the factory with 4mm toughened safety glass conforming to British Standards.
- Available in clear plain glass or stippled obscure glass, with plain glazing bars, square leaded leading, or diamond leaded patterns.
Purpose Made Sizing and Ordering
Every Cedar panelled door is made to measure to your exact millimetre dimensions in the Derbyshire joinery workshop:
- Width Range: Purpose made from 6ft 0in (1829mm) up to 18ft 0in (5486mm) wide.
- Height Range: Purpose made from 6ft 0in (1829mm) up to 7ft 6in (2286mm) as standard. Special bespoke heights up to 10ft 0in (3048mm) can be manufactured on request.
- Ordering Dimensions: All sizes entered on our website are the clear internal opening dimensions of the timber sub frame (daylight width between frame legs, and height from floor to underside of frame head).
Heavy Duty Retractable Operating Gear
The combination of a solid cedar frame and plywood infill makes this one of the lightest traditionally jointed timber doors available, reducing mechanical wear on springs, tracks, and electric operators:
- Lifting Mechanisms: Fitted with heavy duty CD150, CD200, or CD250 retractable running gear matched to the specific span and weight of the door leaf. When opened, the door panel retracts completely inside the garage along overhead tracks with zero panel projection over the drive.
- Roller Tracks: Heavy gauge galvanised C profile steel overhead tracks keep the smooth running polymer rollers securely captured, preventing derailment.
- Box Section Lifting Arms: High strength boxed steel lifting arms connect the door leaf to the multi spring counterbalance system.
- Finger Safe Multi Springs: Multiple zinc plated tension springs on each side provide balanced, light manual lifting and protect fingers against accidental pinch points.
- Weather Stripping: Factory fitted steel top weather strips interlock behind the lifting arm brackets to seal out draughts and enhance top edge security, complemented by flexible lower rubber weather seals.
Drive Through Clearances
Because retractable side lifting arms and multi spring packs mount directly inside the timber sub frame legs, usable drive through dimensions are slightly less than the ordering size:
- Clear Width: The side lifting gear takes approximately 70mm per side, reducing usable drive through width by approximately 140mm at vehicle mirror height.
- Clear Height: When fully open, the bottom edge of the timber panel hangs down slightly below the frame head, reducing clear drive through height:
- Doors up to 8ft (2438mm) wide: clear height reduced by approximately 80mm
- Doors up to 10ft (3048mm) wide: clear height reduced by approximately 120mm
- Doors up to 16ft (4877mm) wide: clear height reduced by approximately 170mm - *Example: A 2134mm x 2134mm (7ft x 7ft) ordering size gives a clear drive through opening of approximately 1994mm wide x 2054mm high.
Locking and Hardware
- Standard Manual Locking: Operated by an ergonomic black exterior T handle activating dual steel spring loaded slam latches at the bottom corners via heavy duty internal cables. Together with the interlocking top steel weather strips, the door is secured at four points when closed.
- Optional Euro Profile Locking: Available with an upgraded euro profile key cylinder.
- Undrilled Face for Electric Automation: When ordering with a Sommer electric remote control operator, the door can be specified without an exterior handle or lock hole, leaving the front face completely smooth, clean, and tamper proof.
Factory Finishes and Timber Preservatives
- Standard Base Coat Immersion Dip: Every door is fully immersed at the factory in a tank of Remmers Light Oak base coat preservative. This provides temporary weather protection during transit and installation for up to 6 weeks. A breathable, microporous top coat wood stain or paint system must be applied to all six faces and edges immediately after installation.
- 8 Factory Standard Translucent Finishes: Professional spray applied Remmers satin woodstain providing long term UV and moisture protection with an erosion period of approximately 5 years before maintenance recoating is required. Available in: Light Oak, Medium Oak, Golden Oak, Dark Oak, Teak, Mahogany, Rosewood, and Walnut.
- Bespoke Paint Colours: Available with a factory white or grey primer, or fully factory painted in classic RAL shades, British Standard colours, or Farrow & Ball palettes. Contact our sales team for bespoke paint pricing.
- *Note on Dark Finishes: Dark finishes on south facing doors absorb high heat levels, which can draw natural moisture and resins from the timber and encourage surface movement. Lighter tones are recommended on exposed south facing elevations.
Timber Fixing Sub Frame Requirements
- Standard 70mm x 70mm Sub Frame: Suitable for single doors up to 8ft wide. Adds 140mm to overall width and 70mm to overall height.
- Heavy Duty 70mm x 90mm Sub Frame: Recommended for double doors and wide single panels. The 70mm dimension remains the face where the gear fixes, while the 90mm depth runs front to back into the garage to provide high rigidity under load.
- Materials: Available in kiln dried softwood or hardwood, supplied knock down with pre machined mortice and tenon joints, base coat treated to match the door. Alternatively, you can supply your own timber sub frame on site (minimum 70mm fixing face).
Sustainably Sourced British Craftsmanship
- PEFC Certified Western Red Cedar: All cedar is ethically sourced from sustainably managed Canadian forests holding full PEFC Chain of Custody accreditation.
- British Manufactured: Built by hand by master joiners in Derbyshire, UK, backed by over 40 years of timber garage door manufacturing pedigree.
Installing Your Cedar Timber Up and Over Door
Every Cedar timber up and over door is joinery crafted from genuine Western Red Cedar and supplied with high quality, heavy duty retractable operating gear. We strongly recommend installation by an experienced garage door fitter. Joinery timber doors are substantial, heavy structures and the counterbalance springs carry high tension.
Important Delivery Information: Unlike pre framed steel doors that arrive fully assembled, Cedar timber up and over doors are delivered as separate components. You will receive the joinery door leaf, the loose timber sub frame (if ordered), and a boxed retractable gear pack containing the tracks, spring packs, pivot arms, and brackets. The running mechanism and hardware must be mechanically assembled and bolted to both the timber sub frame and the door leaf on site.
The guidance below explains what is involved so you can plan the job properly. Always refer to the specific fitting instructions supplied with your door pack, as those take priority on site.
Before You Start
- Check the Delivery: Inspect the door panel, sub frame, and hardware packs as soon as they arrive on the lorry. Report any transit damage or shortages within 48 hours.
- Do Not Strip the Old Door Out Yet: Do not remove your existing door or book your fitter until the new door and all gear packs have arrived on site and been checked.
- Timber Storage: Keep the door leaf in its protective wrapping, stored upright on flat bearers, out of direct sunlight, and completely sheltered from rain and site moisture.
- Two Person Handling: Have at least two capable people on site to lift, hold, and position the door panel. Solid timber joinery is heavy.
- Base Coat Timber Care: If your door is ordered with a factory base coat stain, this is temporary transport protection only. You must apply your chosen microporous top coat stain or paint system to all faces and edges immediately after fitting.
Step 1: Assemble and Fix the Timber Sub Frame
Cedar up and over doors hang within a structural timber sub frame (minimum 70mm x 70mm section, or 90mm x 70mm for double doors). Assemble the frame on a clean, flat floor using the mortice and tenon corner joints. Fix the frame securely to the brickwork either between the reveals or behind the piers.
Crucial: The frame must be plumb, level, and completely square. Measure diagonally from corner to corner; both diagonal dimensions must be identical. If you are reusing an existing timber frame, verify that it is structurally sound, plumb, and fixed firmly to the masonry.
Step 2: Check Door Panel Preparation
On current retractable gear, the top roller brackets and top weather strips arrive pre fitted to the top edge of the timber door leaf at the workshop. Check that these brackets are secure, undamaged, and seated properly before lifting the door panel.
Step 3: Position the Door Leaf in the Frame
With two people, lift the timber door leaf into the timber sub frame. Wedge the door securely in position using timber packing shims. You must allow a consistent 10mm clearance gap down both side frame legs, 10mm clearance under the head frame, and at least 10mm clearance above the finished garage floor.
Step 4: Mount the Horizontal Ceiling Tracks
Slide the horizontal steel tracks over the top rollers. Support the rear of each track from the garage ceiling or roof joists using the steel track hangers and bracing stabilisers supplied. Allow a slight fall of between 25mm and 40mm towards the back of the garage, ensuring the drop is identical on both sides. Fix the front track brackets firmly to the timber frame, then attach the rear rubber travel buffers.
Step 5: Fit the Main Lifting Arms and Bottom Brackets
Fit the bottom weather strips to the door leaf with a small running clearance of around 3mm. Mount the heavy duty side lifting arms to the timber frame legs using the coach bolts supplied, then secure the lower brackets to the door leaf. Take care to drill into the solid perimeter timber framing rails rather than the decorative timber infill, ensuring drill depth does not break through the front face of the cedar panel.
Step 6: Fit the Counterbalance Springs
Prop the door firmly and securely in the fully open horizontal position before touching the springs. Never attempt to install, adjust, or unhook counterbalance springs with the door closed. Hook the multi spring packs onto the upper frame anchors, then attach the bottom spring anchors, keeping the initial adjustment identical on both sides.
Step 7: Check Door Balance and Running Alignment
Carefully remove the props and test the manual door action. The door should lift smoothly and both lifting arms must contact their rubber travel buffers at the exact same moment. If the door feels heavy to lift or pulls shut too aggressively, open and prop the door again to adjust the spring tension anchors. A correctly balanced timber door should rest stationary around one third of the way open and move effortlessly by hand.
Step 8: Final Checks and Lubrication
Confirm that the top rollers run freely within the tracks without binding and that the door leaf clears the frame jambs cleanly during its entire swing arc. Apply light machine oil to the arm pivot pins, roller bearings, and spring anchor hooks. Do not grease the inside of the horizontal tracks.
Finishing After Installation
If your door is supplied in a factory base coat stain, apply a high quality microporous finishing system (such as Remmers) to every timber surface immediately after installation. This includes the front face, rear face, and crucially the top, bottom, and side end grain edges. Factory base coat protection lasts approximately six weeks. Doors supplied fully factory finished are ready for immediate use, though minor water marks from fresh rain will disappear once the timber finish fully cures.
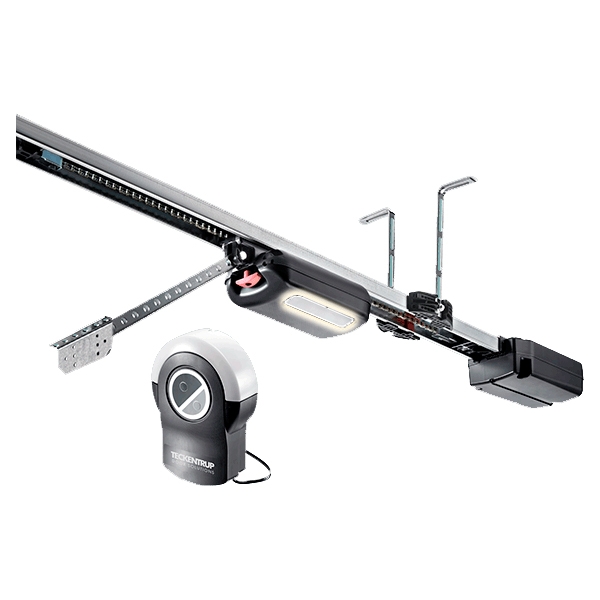
Automating with the Sommer pro+ Electric Garage Door Operator
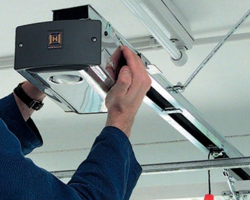
For smooth, dependable remote control operation, Cedar timber retractable doors pair perfectly with the Sommer pro+ 1100N electric garage door operator. Engineered in Germany, its 1100N pulling and pushing force easily handles the mass of solid joinery timber doors up to 200kg.
Operator Package Highlights
|
 |
Important Checks Before Installing the Electric Operator
- Manual Balance Must Be Perfect: The timber door must be fully installed, aligned, and running easily by hand before connecting an electric drive. An electric operator is designed to move a balanced door, not force an out of square or stiff mechanism.
- Locking Setup: We recommend ordering the door without a handle or exterior lock hole. If automating a manual door fitted with latches, you must mechanically isolate or remove the side latches so the door cannot lock itself shut against the motor.
- Ceiling and Headroom Checks: Ensure you have sufficient internal garage depth for the motor boom and at least 35mm headroom between the highest point of door travel and the ceiling.
- External Emergency Release: If your garage has no separate side door or rear pedestrian entrance, you must fit an external manual release device to allow emergency access during a mains power cut.
Operator Installation Steps
- Assemble the heavy duty steel drive rail and secure the front header bracket centrally to the timber frame head or structural lintel.
- Lift and suspend the drive rail to the garage ceiling joists using the supplied steel hanger brackets, keeping the rail level and square to the door opening.
- Bolt the operator door towing bracket centrally to the solid top framing rail of the cedar door. Fasten firmly into the solid perimeter timber framing, never into thin tongue and groove panel cladding.
- Connect the curved door towing arm between the door bracket and the Sommer motor carriage.
- Mount the separate wall control unit, connect the low voltage link cable to the rail, and plug the unit into a standard 230V domestic socket.
- Initiate the automatic learning cycle so the operator maps its open and closed travel limits and registers the exact force required to lift the timber door.
- Test the obstacle safety reversal system using a solid object placed on the floor, and verify that the internal manual release cord disengages the motor smoothly.
Your Cedar Door Warranty with GarageDoorsOnline
Your Cedar timber up and over garage door comes with a 2 year comprehensive manufacturer warranty, supported directly by GarageDoorsOnline. If you experience an issue, contact us directly and our team will work with the joinery workshop at Cedar Door to resolve it quickly and fairly.
What Is Covered
- Door Panel Joinery: Covered for 2 years against manufacturing defects, joint failure, or glue line separation in the timber leaf and chassis.
- Retractable Operating Gear: Covered for 2 years against mechanical failure, material defects, and spring breakage under normal domestic operating conditions.
- Factory Applied Finishes: Factory standard microporous translucent wood stains are covered for 2 years against peeling, blistering, or flaking.
- Sommer pro+ Electric Operators: If ordered with a Sommer pro+ electric operator, Sommer provides a 5 year warranty on the motor drive unit, motor carriage, and electronics, plus 2 years on radio transmitters and accessories. All automation claims are handled directly through GarageDoorsOnline.
Warranty Conditions
To keep your warranty valid, the following practical conditions must be met:
- Correct Installation: The door must be installed strictly in accordance with the manufacturer instructions, hung in a square, plumb, and structurally sound timber fixing sub frame (minimum 70mm x 70mm, or 90mm x 70mm for double doors).
- Immediate Sealing of Base Coated Doors: Doors supplied in a temporary factory base coat stain must receive a full top coat finishing system on all faces and edges immediately after installation. A base coat dip provides transport protection only for up to 6 weeks and is not a weather seal.
- Suitable Finishing Products: Base coated timber must be finished using a high quality, breathable, microporous exterior wood stain or paint system (such as Remmers). Traditional non breathing gloss paints, boat varnishes, or polyurethane sealers must never be used.
- Ongoing Maintenance: Timber finishes must be inspected annually and recoated periodically depending on local weather exposure and elevation. Operating gear pivots and rollers should be lubricated with light oil twice per year.
- Storage Prior to Fitting: Doors must be kept upright on level timber battens, inside their original protective shrink wrap, completely shielded from rain, damp ground, and direct sunlight until fitted.
Timber Is a Natural Material: What Is Expected
Western Red Cedar is a living, natural timber renowned for its distinct character, fine grain, and varying colour tones ranging from light straw to deep reddish brown. The joiners at Cedar Door hand select and balance boards during production, but natural variations are inherent to timber and are not defects. The warranty does not cover:
- Natural colour shade variations between individual tongue and groove boards or between the door face and timber sub frame
- Small sound knots, surface grain lift, minor drying shakes, or surface hairline checks
- Natural cedar resin or tannin exudation
- Minor joint opening or contraction caused by atmospheric humidity changes between seasons
- Natural deflection and seasonal movement: Inherent timber movement of up to 25mm on single doors (up to 8ft wide/high) and up to 60mm on double doors (up to 16ft wide) falls within normal British joinery manufacturing tolerances and does not affect long term structural integrity.
What Is Not Covered
- Water marks, staining, or mould caused by site water or rain before a base coated door has been sealed
- Moisture ingress or timber distortion resulting from unsealed top, bottom, or end grain edges
- Excessive warping or resin weeping caused by dark painted finishes on south facing elevations exposed to intense direct sun
- Accidental damage, vehicle impact, aggressive chemical contact, or malicious damage
- Incorrect installation, alteration of components, or force fitting into an out of square opening
- Fitting, refitting, labour, or consequential costs incurred by third party tradespeople
Inspection on Delivery
Please inspect your door leaf and hardware packs in natural daylight immediately upon delivery:
- The 3 Metre Inspection Standard: Stand approximately 3 metres back from the door panel in natural daylight. If minor manufacturing marks, indentations, or slight colour variations are not easily visible from this viewing distance, the door is considered acceptable within trade standards.
- Report Within 48 Hours: Report any transit damage, surface blemishes, or hardware shortages in writing to us within 48 hours of delivery.
- Fitting Implies Acceptance: Never install or drill a door panel that you believe is damaged or imperfect. Fitting the door leaf constitutes acceptance of its cosmetic condition, and refitting costs are not covered under warranty.
How to Submit a Warranty Claim
If you need assistance or wish to log a warranty query, please contact our warranties team:
Telephone: 01926 351060
Email: enquiries@garagedoorsonline.co.uk
Please have the following information ready to help us process your claim quickly:
- Your full name, delivery postcode, and original order number
- A clear description of the issue and its location on the door or gear
- One close up photograph showing the specific detail, and one overall photograph taken from 3 metres back showing the complete door in its opening
- A copy of your signed delivery note, where available
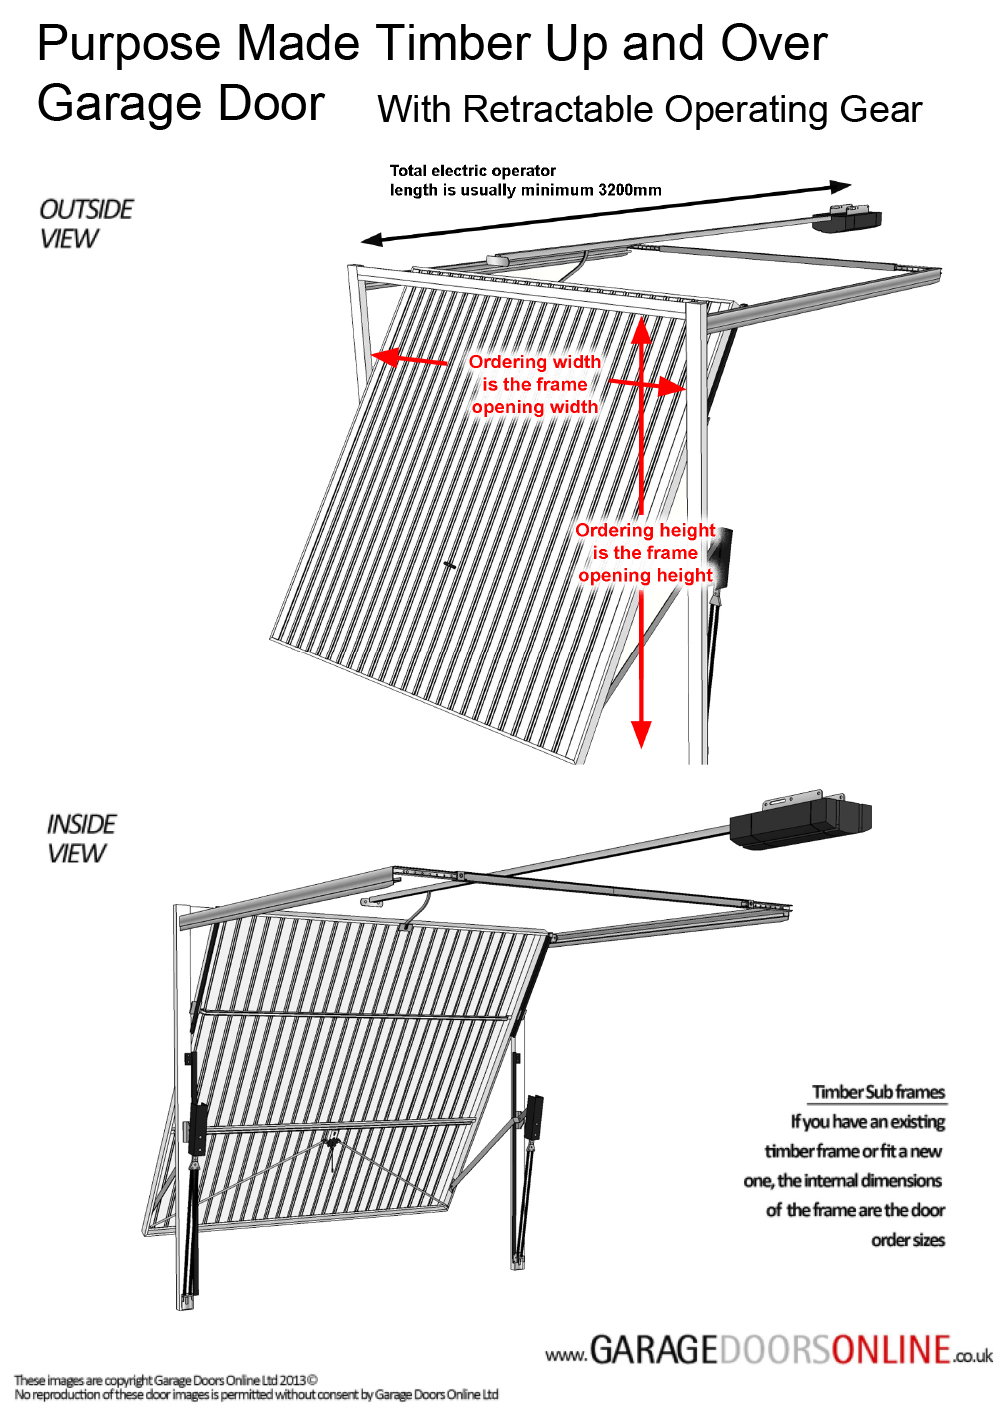
Measuring and Ordering Size Guide: Cedar Timber Up and Over Doors
Every Cedar timber up and over garage door is made to measure to your exact millimetre dimensions in the joinery workshop. All Cedar up and over doors in this range operate on heavy duty retractable operating gear as standard.
Crucial Rule on Ordering Sizes: The ordering size for a Cedar timber door is always the clear internal opening dimension of the timber fixing sub frame (the daylight width between the upright frame legs, and the height from the finished floor to the underside of the frame head). It is not the outer brick opening and not the outside dimensions of the frame.
Understanding the Timber Sub Frame
Timber up and over doors require a solid timber fixing sub frame to mount the door leaf, side pivot arms, and overhead horizontal tracks:
- Standard 70mm x 70mm Sub Frame: Suitable for standard single door sizes. The timber profile measures 70mm on the face by 70mm in depth. A standard frame adds 140mm across the overall width (70mm each side) and 70mm to the overall height.
- Heavy Duty 70mm x 90mm Sub Frame (Recommended for Larger Doors): Recommended on double doors or wider single doors over 8ft (2438mm) wide to support the weight of heavy cedar panels without bowing. Important: The 70mm dimension remains the face of the frame (for inbetween aperture installations) where the lifting gear, weather strips, and pivot arms fix. The larger 90mm dimension runs front to back into the garage, giving substantial structural rigidity and depth where the side spring anchors and track brackets bolt. Because the face width is still 70mm, it adds the same 140mm across the total width and 70mm to the height.
- Supplying Your Own On Site Timber Frame: You are not obliged to buy our factory timber frame. You can source and build your own timber sub frame on site. As long as the fixing face is a minimum of 70mm to carry the retractable gear brackets, you can use larger timber sections (such as 100mm, 125mm, or wider) to pack out an oversized brick opening to create whatever clear internal opening size you want. You simply measure the clear opening inside your finished timber frame and order the door to suit.
- *Note: Timber sub frames have no floor threshold; the frame consists of two vertical jambs and one horizontal head piece.
How to Measure Your Opening
- Measure the Width: Measure the brick to brick width at the top, middle, and bottom of the opening. Always record the smallest measurement.
- Measure the Height: Measure from the finished garage floor up to the underside of the lintel at the left side, centre, and right side. Always record the smallest measurement.
- Check Level and Square: Check the floor for level across the opening. Use a spirit level on both brick piers and check diagonal dimensions from corner to corner to determine if the brickwork is out of square.
- Check Internal Depth and Obstructions: Because retractable gear travels horizontally back into the garage, check for ceiling joists, roof trusses, light fittings, consumer units, or pipework that could obstruct the high level tracks or an electric operator.
Choosing Your Fitting Position
Option A: Fitting Behind the Brickwork (Internal Face Fit)
This is usually the preferred method because it preserves the full structural brick opening for vehicle access, giving you maximum drive through width and height.
- Ordering Width: Equal to the clear brick opening width.
- Ordering Height: Equal to the clear brick opening height (floor to lintel).
- Internal Wall Space Required: You need at least 70mm of flat, unobstructed brick face behind each side pier, plus at least 70mm of headroom above the lintel to secure the sub frame. It is often better to use a 90 x 70 profile timber frame for the legs for a face fit behind and sometimes even larger on the width if you are looking to take up some uneven stonework or out of square opening. Speak to us about any special size timber sub frame requirements.
Option B: Fitting Between the Brickwork (Reveal Fit)
Choose this installation position when the garage lacks internal return piers or when you want the door flush with the external brick face.
- Ordering Width: Brick opening width, minus 140mm for standard 70mm face frame legs, minus your fitting tolerance (deduct 10mm minimum).
- Ordering Height: Floor to lintel height, minus 70mm for the frame head, minus your fitting tolerance (deduct 5mm minimum).
- *Tolerance Example: On a brick opening measuring 2400mm wide x 2150mm high using a 70mm face frame:
Ordering Width = 2400mm - 140mm frame - 10mm tolerance = 2250mm
Ordering Height = 2150mm - 70mm head - 5mm tolerance = 2075mm - *If you build your own timber frame using wider timber sections (for example 100mm faces to close down a wide opening), simply deduct twice the face width of your timber plus your fitting tolerance from the brick width.
Option C: Reusing an Existing Sound Timber Frame
If your garage already has a sound, square, rot free timber frame with a minimum fixing face of 70mm, you can order a door leaf to fit straight inside it:
- Measure the clear width between the internal faces of the existing timber jambs at the top, middle, and bottom.
- Measure the clear height from the finished floor to the underside of the existing timber head at both sides and the centre.
- Use the smallest width and height measurements as your exact ordering size. Check that the frame is square by ensuring both diagonal corner measurements are identical.
Internal Garage Clearances for Retractable Operating Gear
All Cedar up and over garage doors use retractable lifting mechanisms. When the door is opened, the timber leaf swings outward before retracting smoothly into the garage along high level horizontal tracks suspended from the ceiling:
- Garage Depth Clearance: You must have clear ceiling depth equal to the door ordering height plus at least 400mm for the horizontal tracks and rear rubber buffers. If you are adding a Sommer electric operator, allow at least 3250mm total clear depth behind the lintel.
- Headroom for Tracks: The horizontal ceiling tracks run back into the garage level with the top of the timber frame head. Ensure there are no cross beams or pipes within this upper zone.
- Side Clearance for Lifting Arms: The side multi spring packs and pivot arms mount to the inside face of the timber frame legs and swing inward during travel. Keep the area immediately behind the frame legs clear of shelving or tool racking.
Drive Through Width and Height Clearances
Because the retractable mechanism sits inside the timber frame opening, the usable drive through dimensions when driving a car into the garage are smaller than the ordering size:
- Drive Through Width: The side lifting arms and spring packs reduce the usable drive through width by approximately 140mm at vehicle wing mirror height.
- Drive Through Height: When the door is in the fully open horizontal position, the lower edge of the timber panel hangs down slightly below the frame head. This reduces clear drive through height by:
- Doors up to 8ft (2438mm) wide: clear height reduced by approximately 80mm
- Doors up to 10ft (3048mm) wide: clear height reduced by approximately 120mm
- Doors up to 16ft (4877mm) wide: clear height reduced by approximately 170mm
| Ordering Size (Internal Frame) | Approximate Clear Drive Through Width | Approximate Clear Drive Through Height |
|---|---|---|
| 2134mm x 2134mm (7ft x 7ft) | 1994mm | 2054mm |
| 2438mm x 2134mm (8ft x 7ft) | 2298mm | 2054mm |
| 3048mm x 2134mm (10ft x 7ft) | 2908mm | 2014mm |
| 4877mm x 2134mm (16ft x 7ft) | 4737mm | 1964mm |
Common Imperial to Metric Reference Chart
| 6ft 0in: 1829mm | 7ft 0in: 2134mm | 7ft 6in: 2286mm | 8ft 0in: 2438mm |
| 9ft 0in: 2743mm | 10ft 0in: 3048mm | 12ft 0in: 3658mm | 14ft 0in: 4267mm |
| 16ft 0in: 4877mm | 18ft 0in: 5486mm | ||
Need Measuring Advice?
If you have an unusual garage layout, uneven brickwork, low ceiling joists, or want to build a custom timber sub frame to suit a specific aperture, our experienced technical team is here to help:
Telephone: 01926 463888
Email: enquiries@garagedoorsonline.co.uk
Send us your rough opening dimensions along with a couple of photographs showing the opening from the outside and the ceiling/walls inside, and we will confirm the exact ordering sizes for your door.
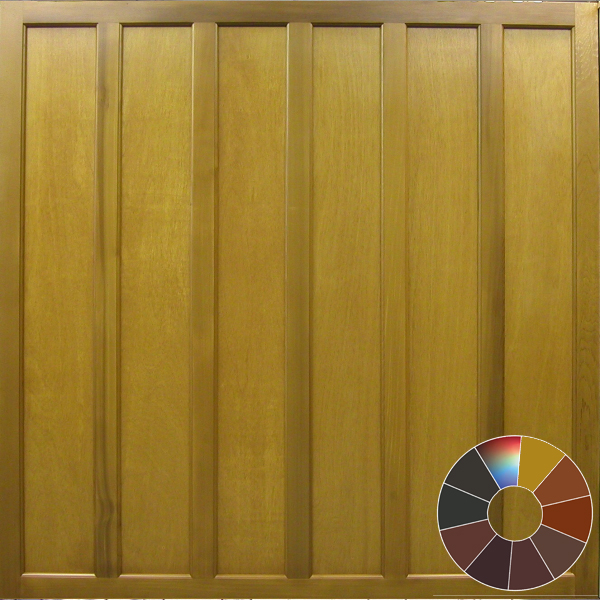 Cedar Castleton
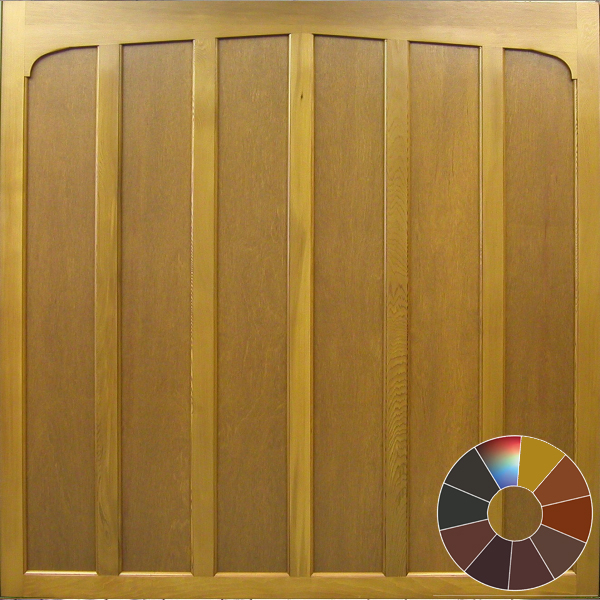 Cedar Chatsworth
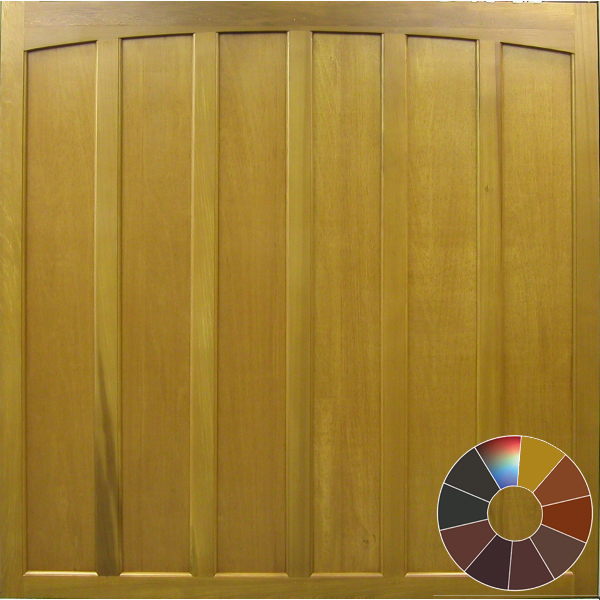 Cedar Wingfield
 Our Promise
We pride ourselves on our customer service and are always happy to help